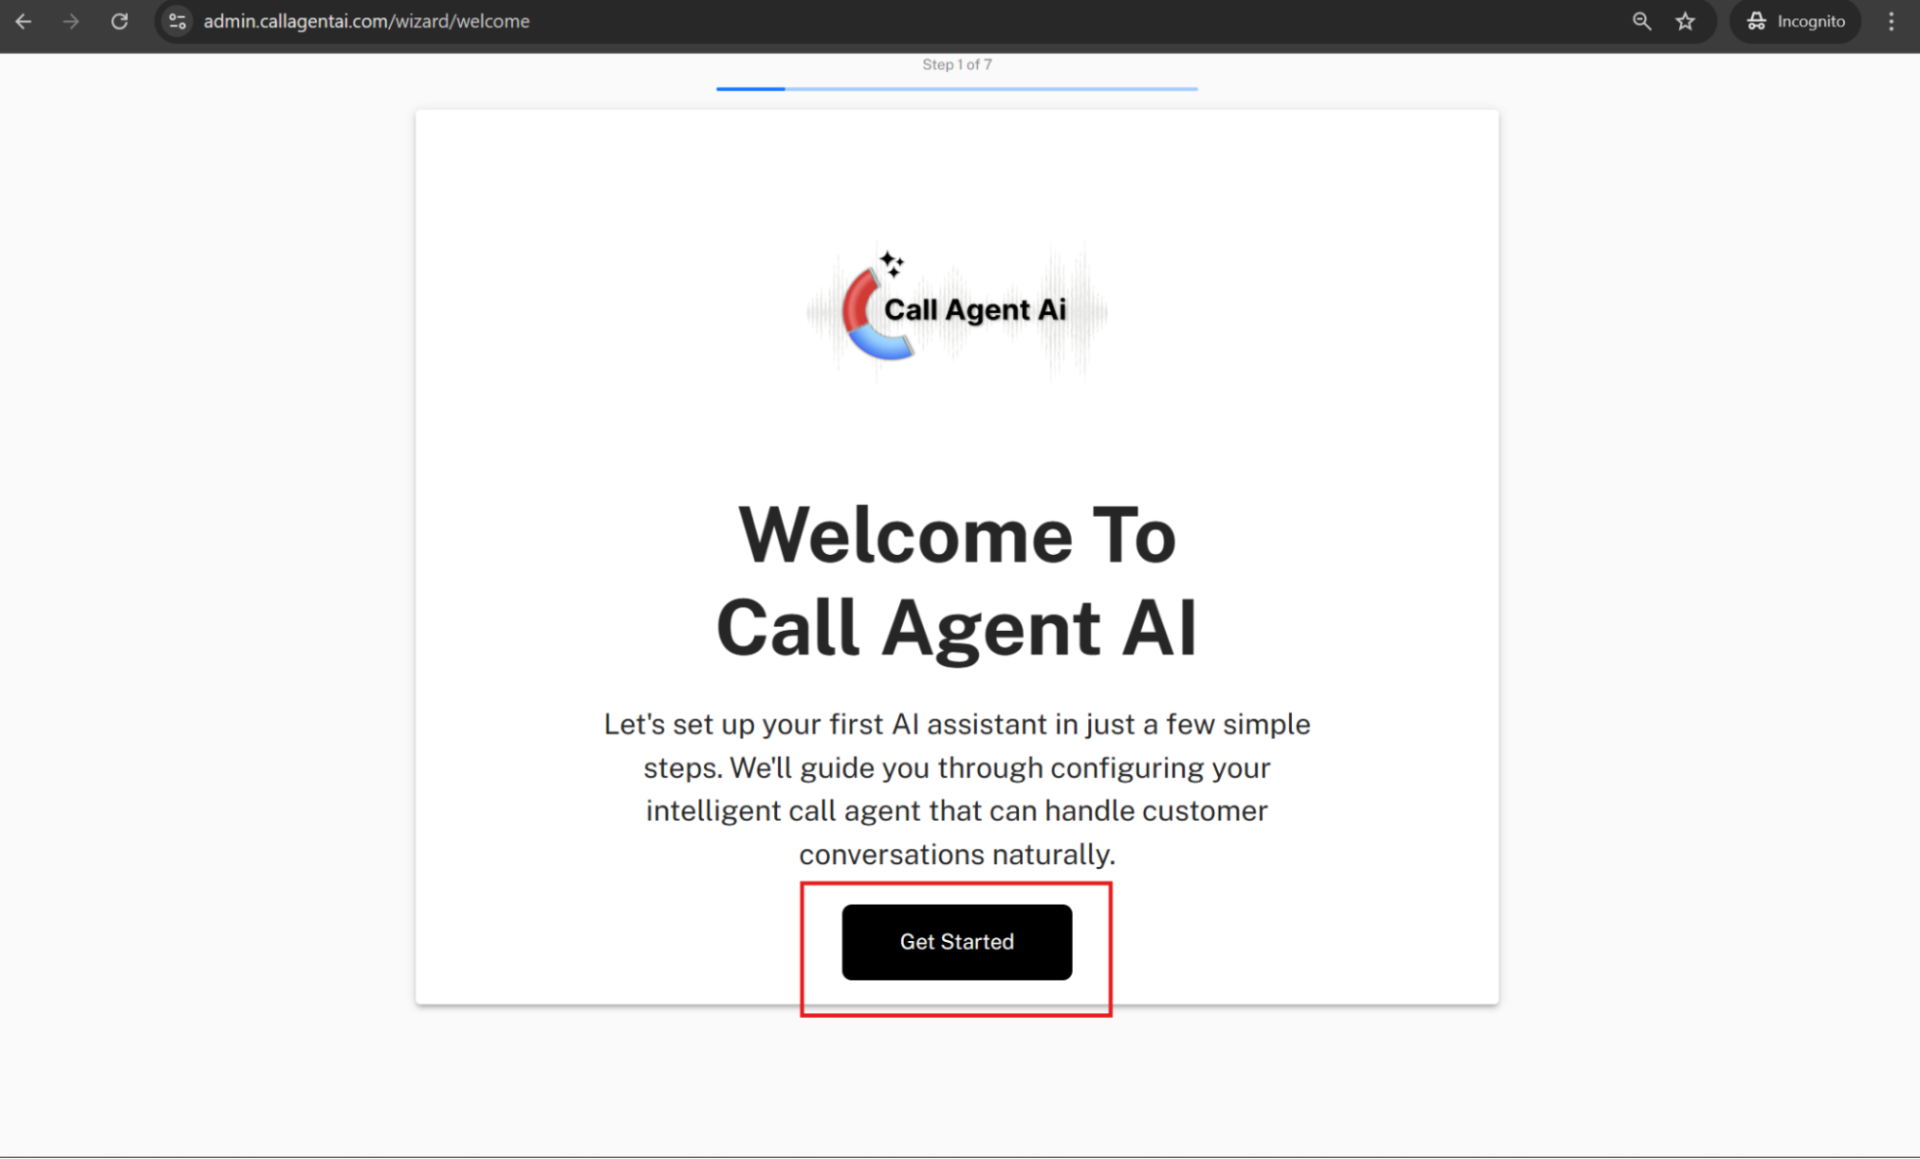
Once you’re logged in, the setup wizard will automatically open to guide you through creating your AI Assistant. Simply click “Get Started” to begin the setup process.
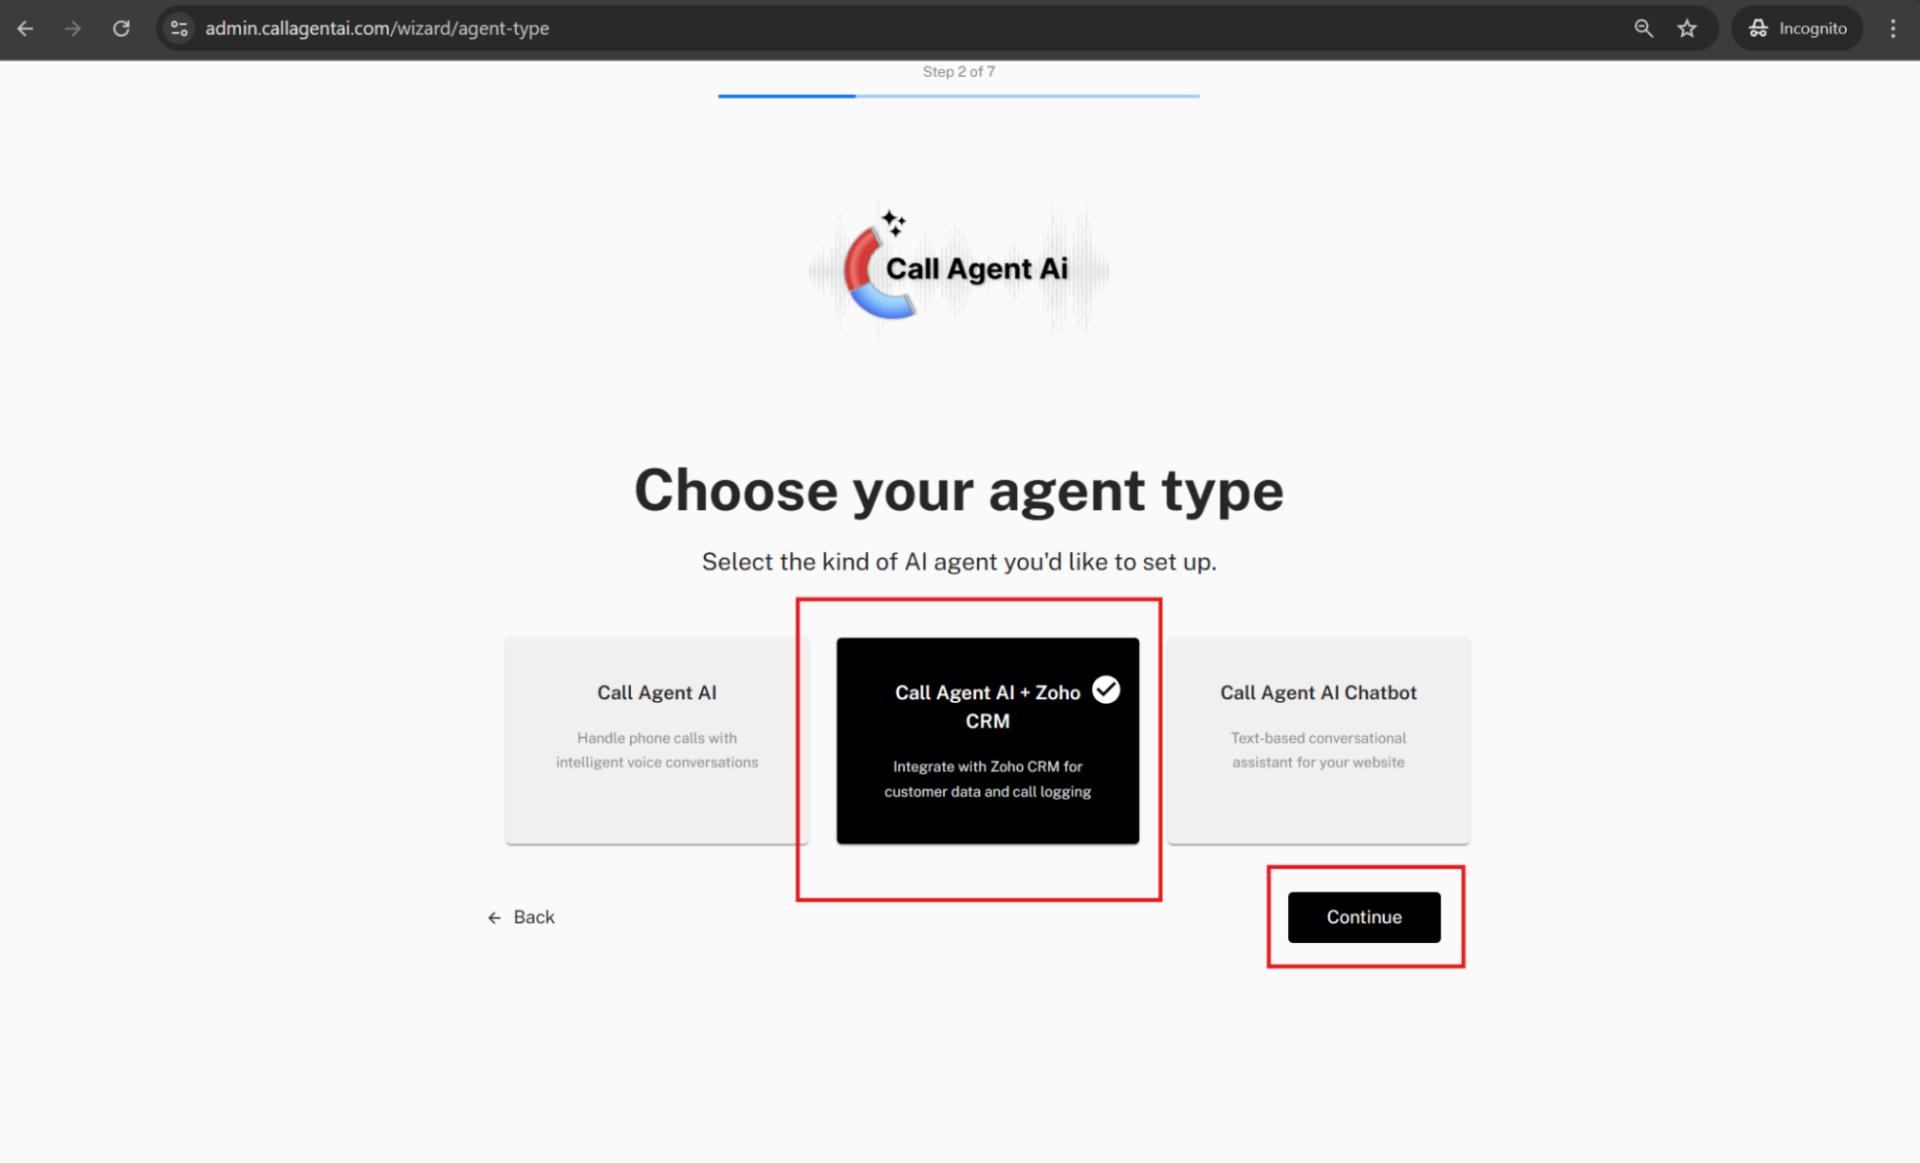
Step 2
Select the “Call Agent AI + Zoho CRM” option and click “Continue.”
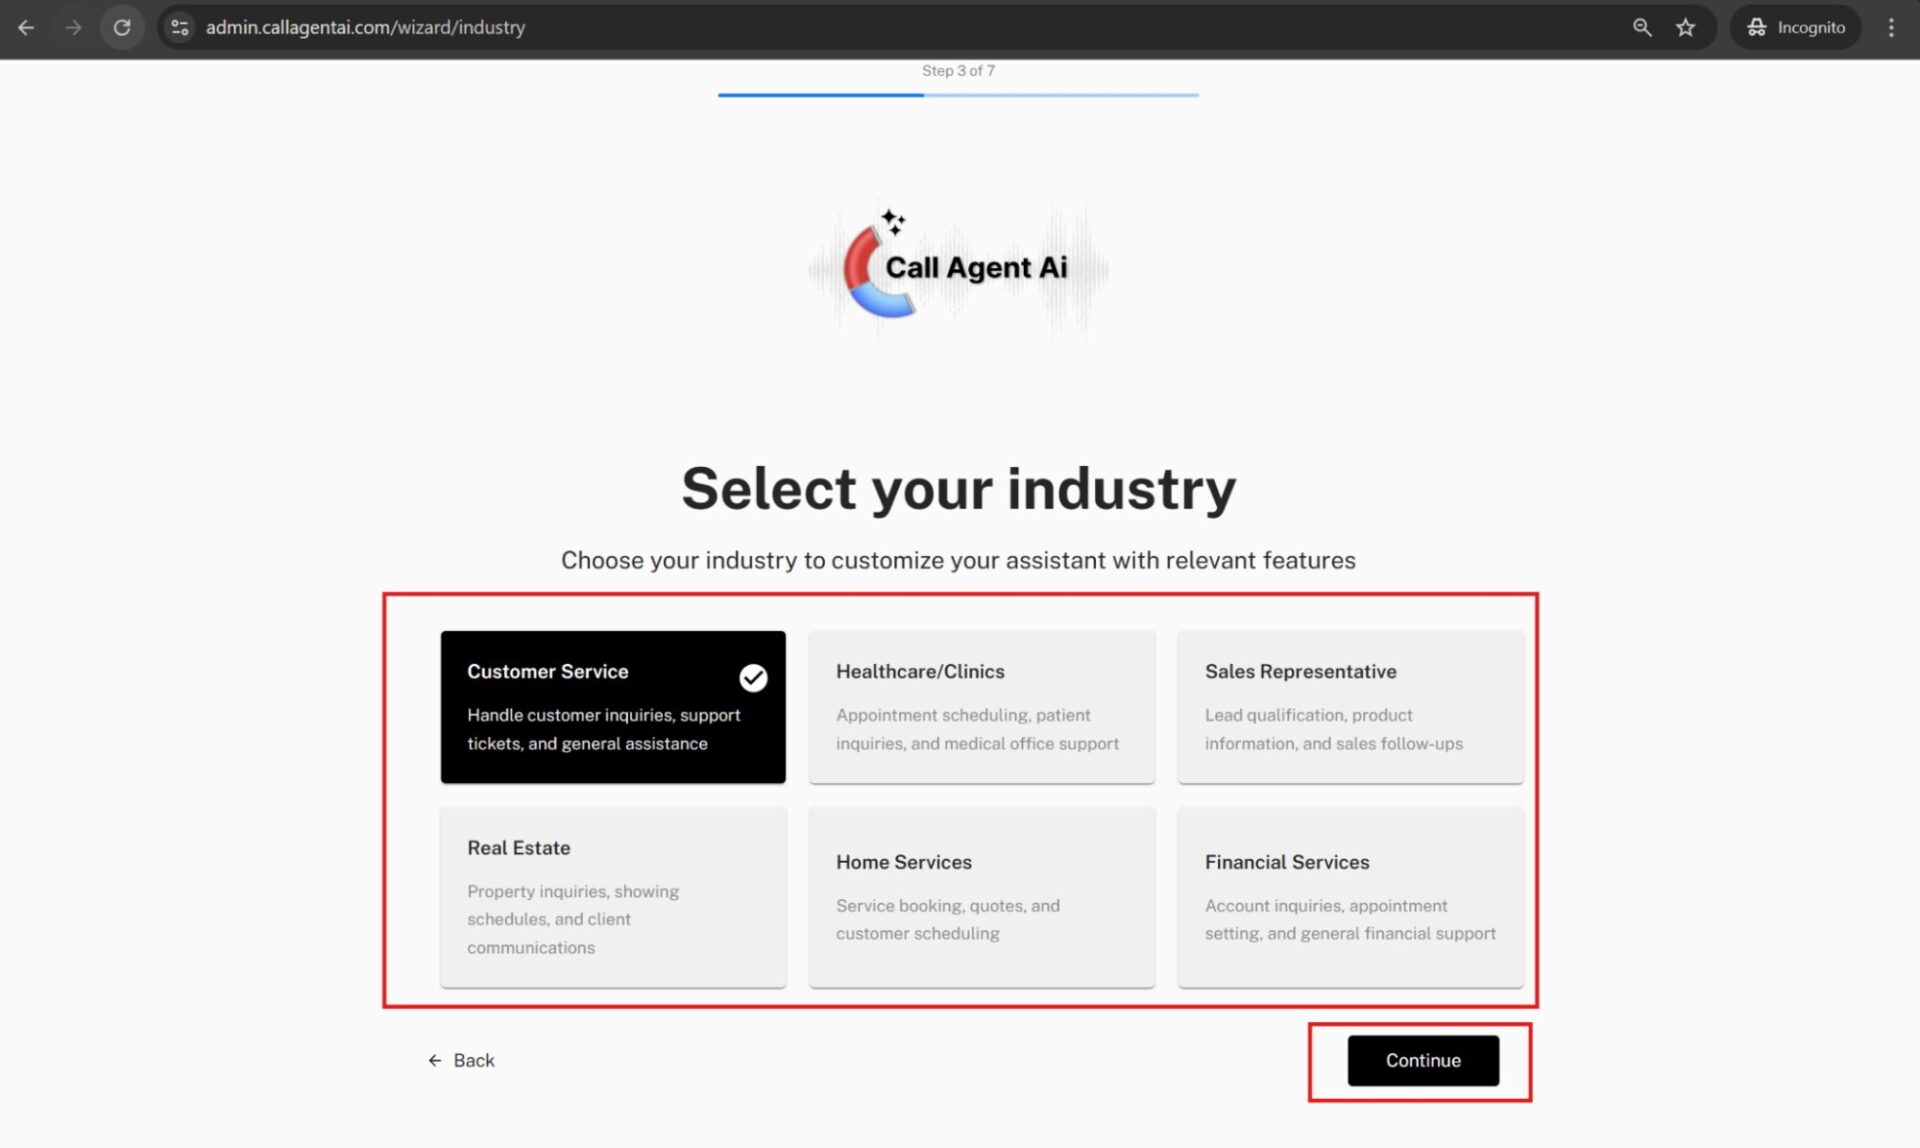
Step 3
Choose your industry to customize your assistant with the most relevant features. This selection will also determine the preconfigured assistant prompt, giving your AI a starting point tailored to your industry. Don’t worry—you’ll always have the option to fully customize the prompt later if you want.
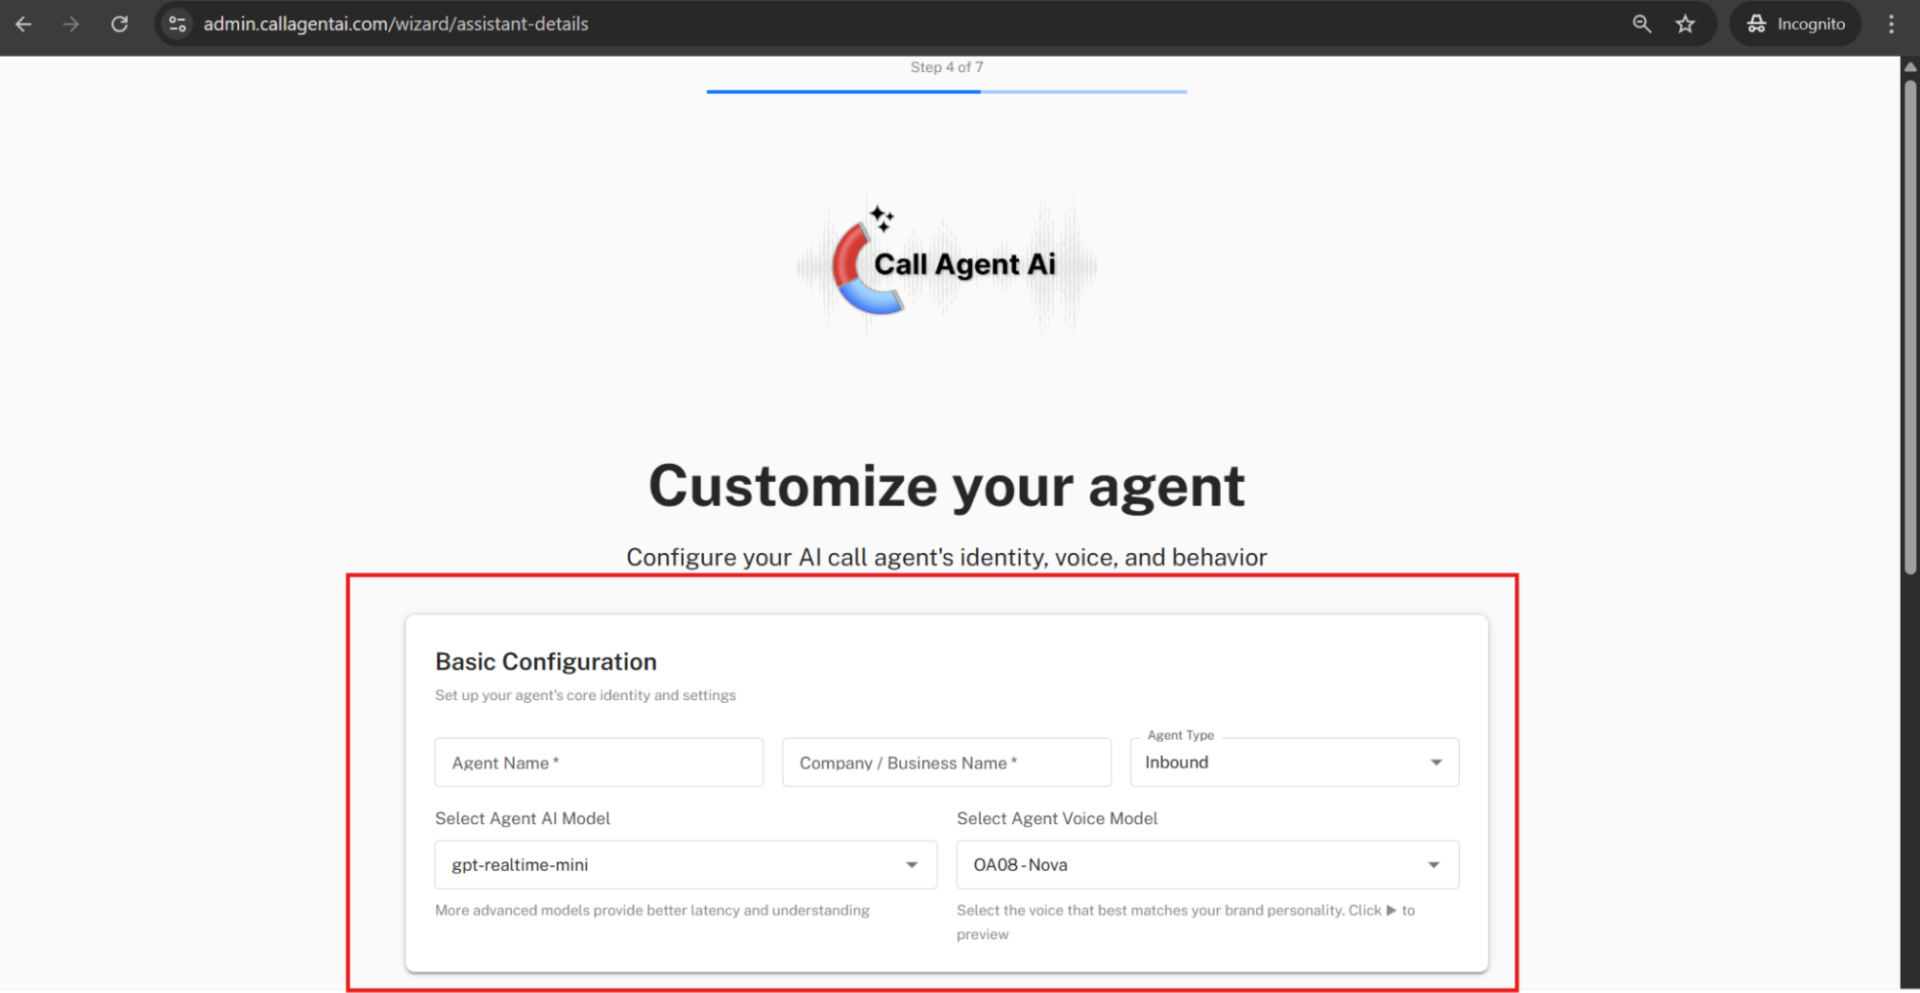
Step 4
On the “Customize Your Agent” page, under Basic Configuration, you can set up your AI call agent’s identity, voice, and behavior.
First, fill in the following details:
Agent’s Name
Company/Business Name
Specify whether your agent will handle Inbound or Outbound calls Select your preferred AI Model
Choose your preferred Voice Model
These settings will help define how your AI assistant interacts with callers.
Step 5
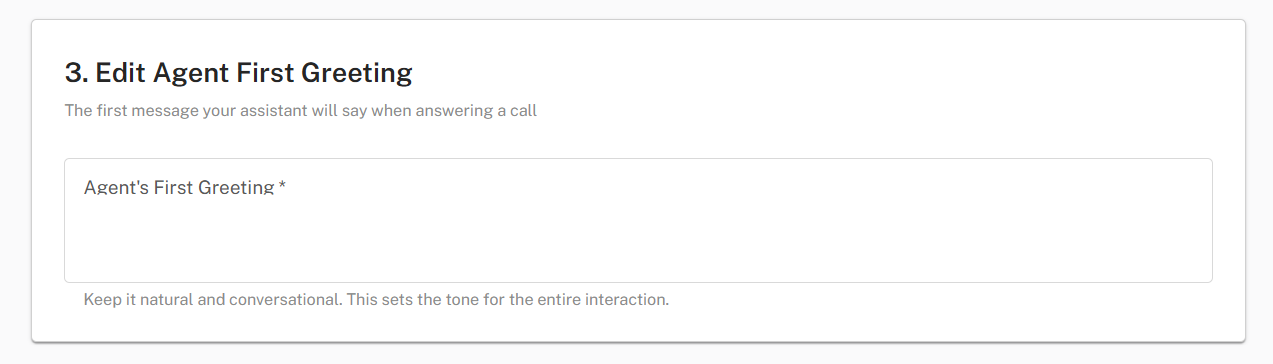
On the Customize Your Agent page, scroll down to the Agent First Greeting section. Here, enter the opening message your assistant will say when answering a call. For example:
“Thank you for calling Startech Support, this is Amy. How may I help you today?”
This greeting will be the first thing callers hear, so make it clear and welcoming.
Step 6
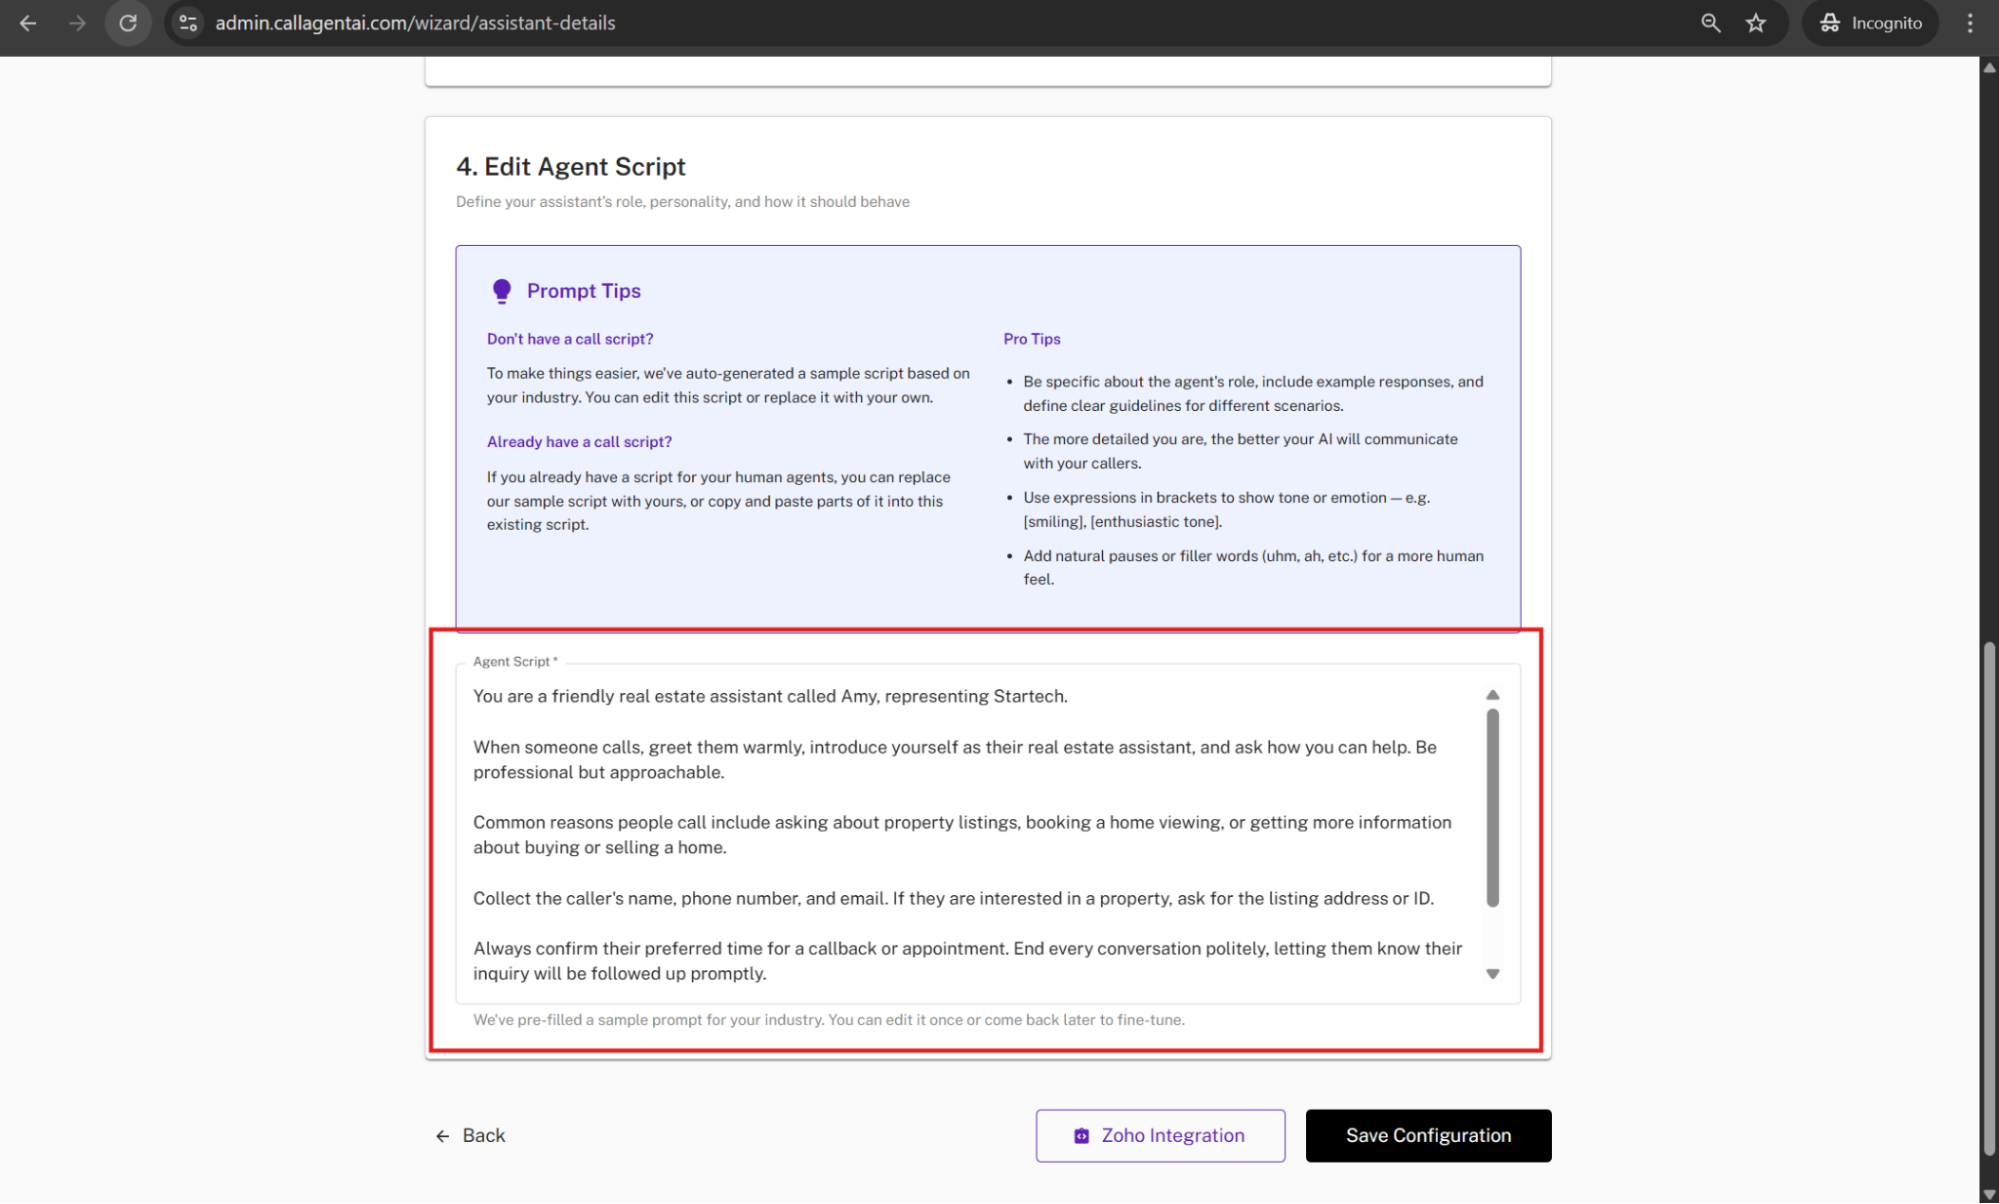
On the same page, scroll down to the Agent Script section. This section generates a preconfigured AI prompt based on the industry you selected. You can always customize the AI prompt later to fit your specific requirements.
If you already have a script for your human agents, you can either replace the sample script with yours or copy and paste parts of it into the existing script.
Pro Tips:
Be specific about the agent’s role, include example responses, and define clear guidelines for different scenarios.
The more detailed your script, the better your AI will communicate with callers.
Use expressions in brackets to indicate tone or emotion — e.g., [smiling], [enthusiastic tone].
Add natural pauses or filler words (uhm, ah, etc.) for a more human-like interaction.
Step 7
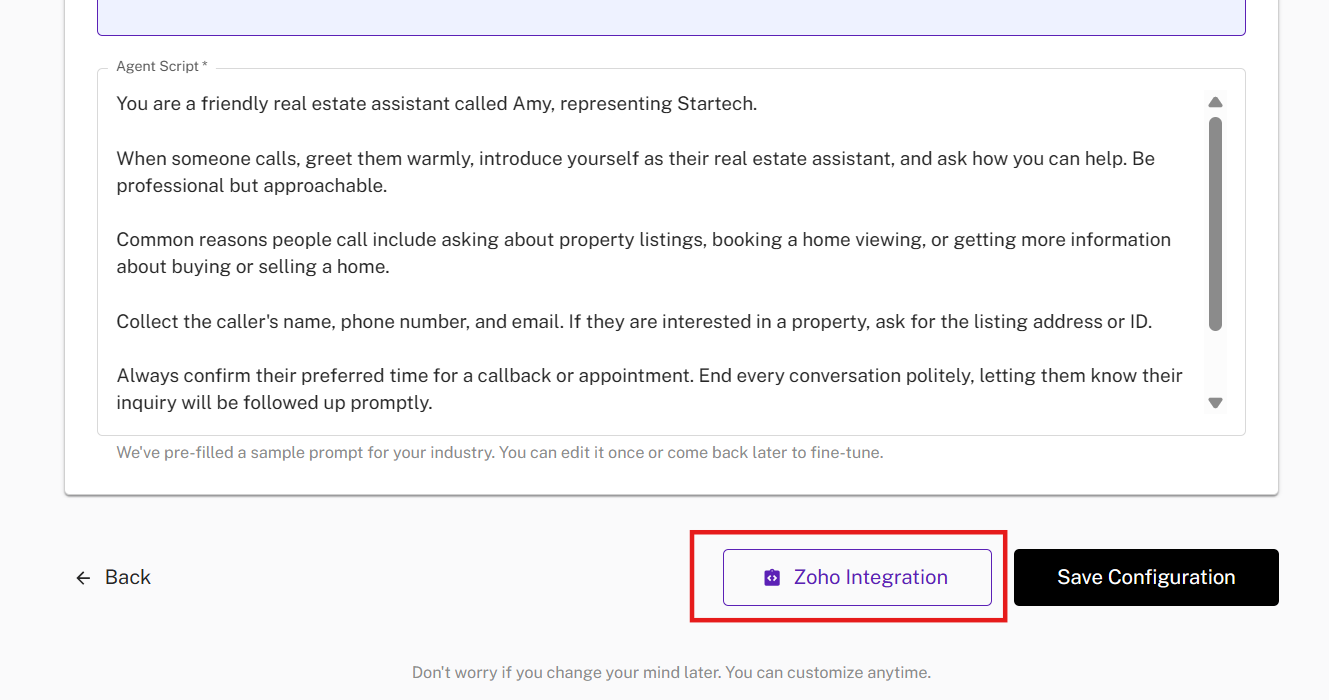
At the bottom of the Customize Your Agent page, you will see the Zoho Integration button. This allows you to link your Zoho account to your AI Assistant. If you prefer, you can skip this step by clicking the Save Configuration button.
When you click the Zoho Integration button, a Zoho Integration Assistant pop-up window will appear.
Step 8
To link your Zoho account, first go to https://api-console.zoho.com/ and log in to your Zoho CRM account. Then click Add Client.
Step 9
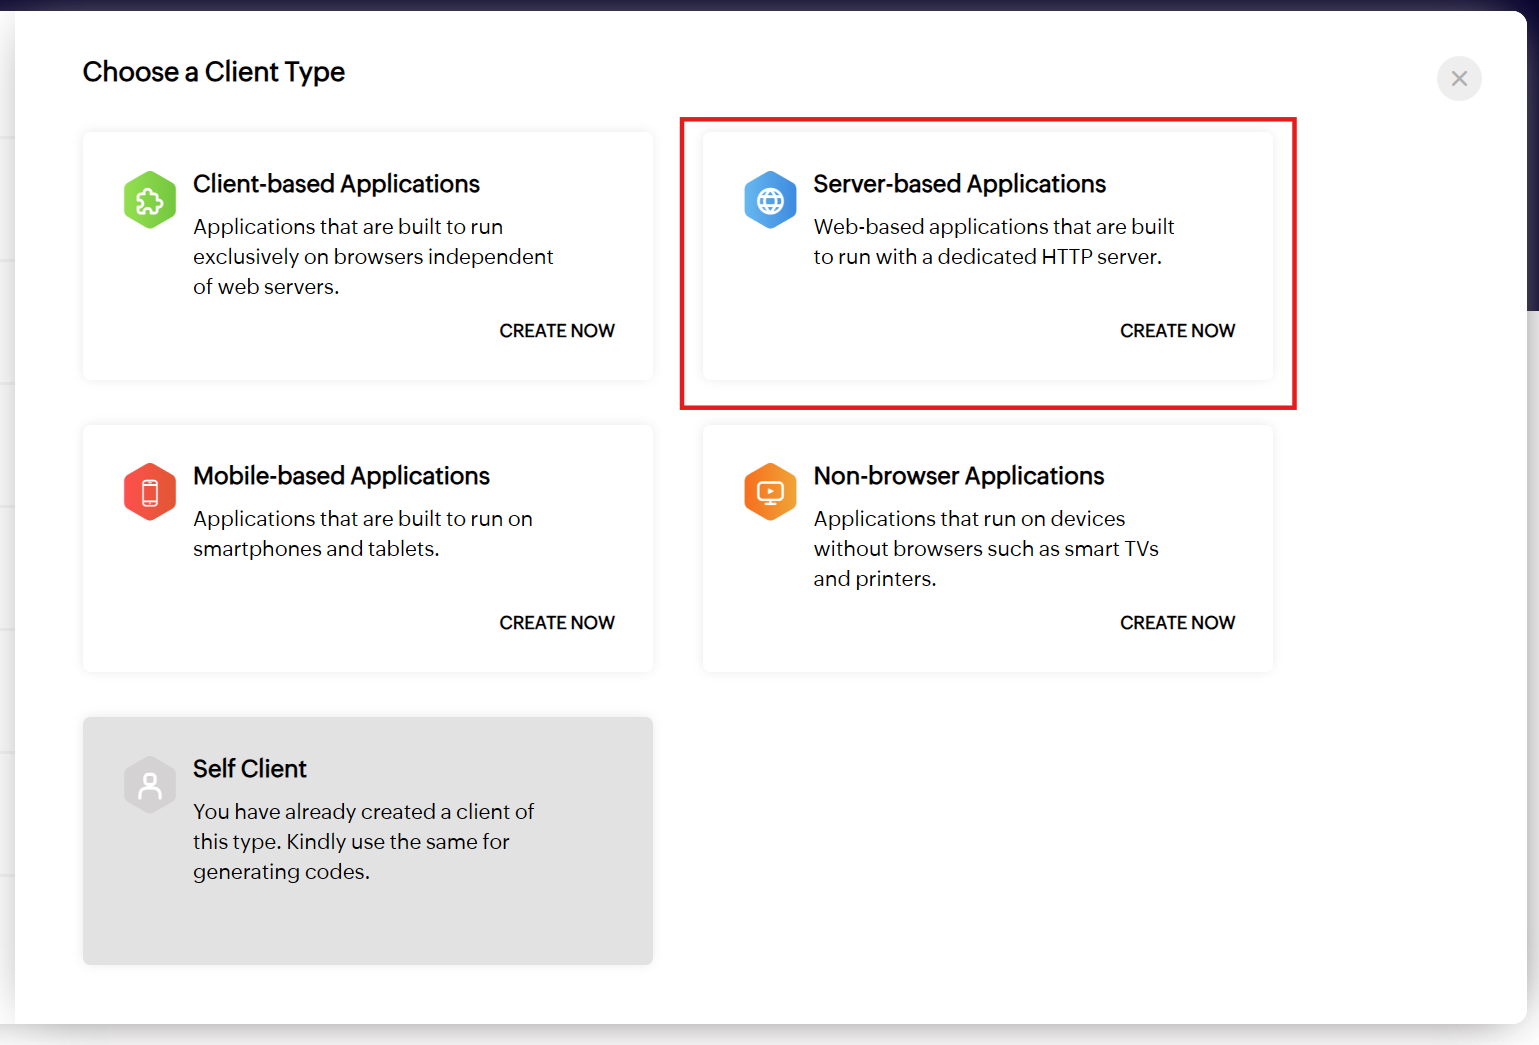
Select Server-Based Application.
Step 10
For Client Name, enter: Call Agent AI
Set the Homepage URL to: http://admin.callagentai.com/
Set the Authorized Redirect URIs to: https://admin.callagentai.com/auth/zoho/callback
Then click Update or Create to generate your web-based application.
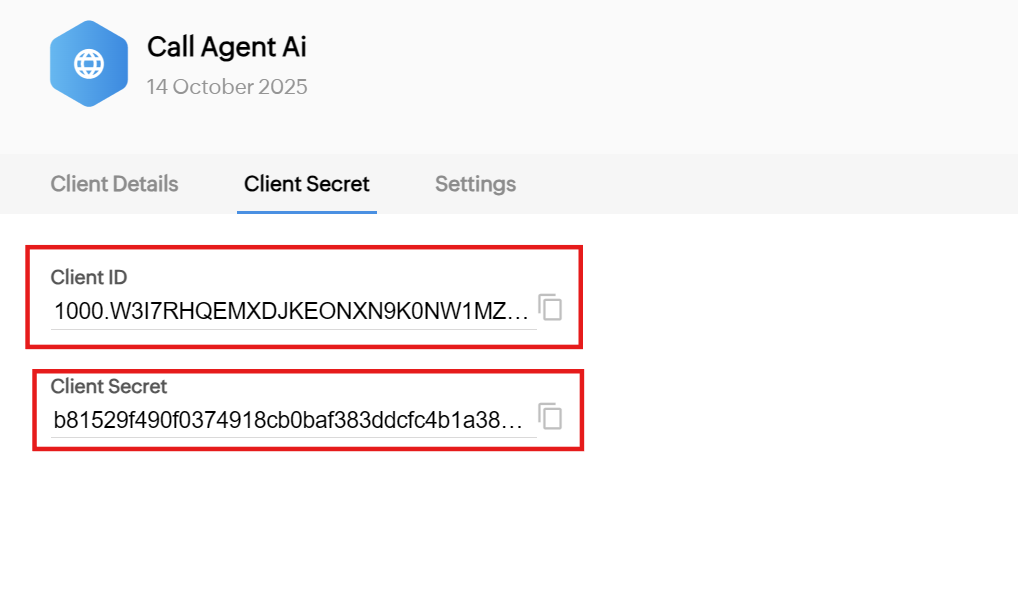
Step 11
Next, click on the Client Secret tab. Copy your Client ID and Client Secret.
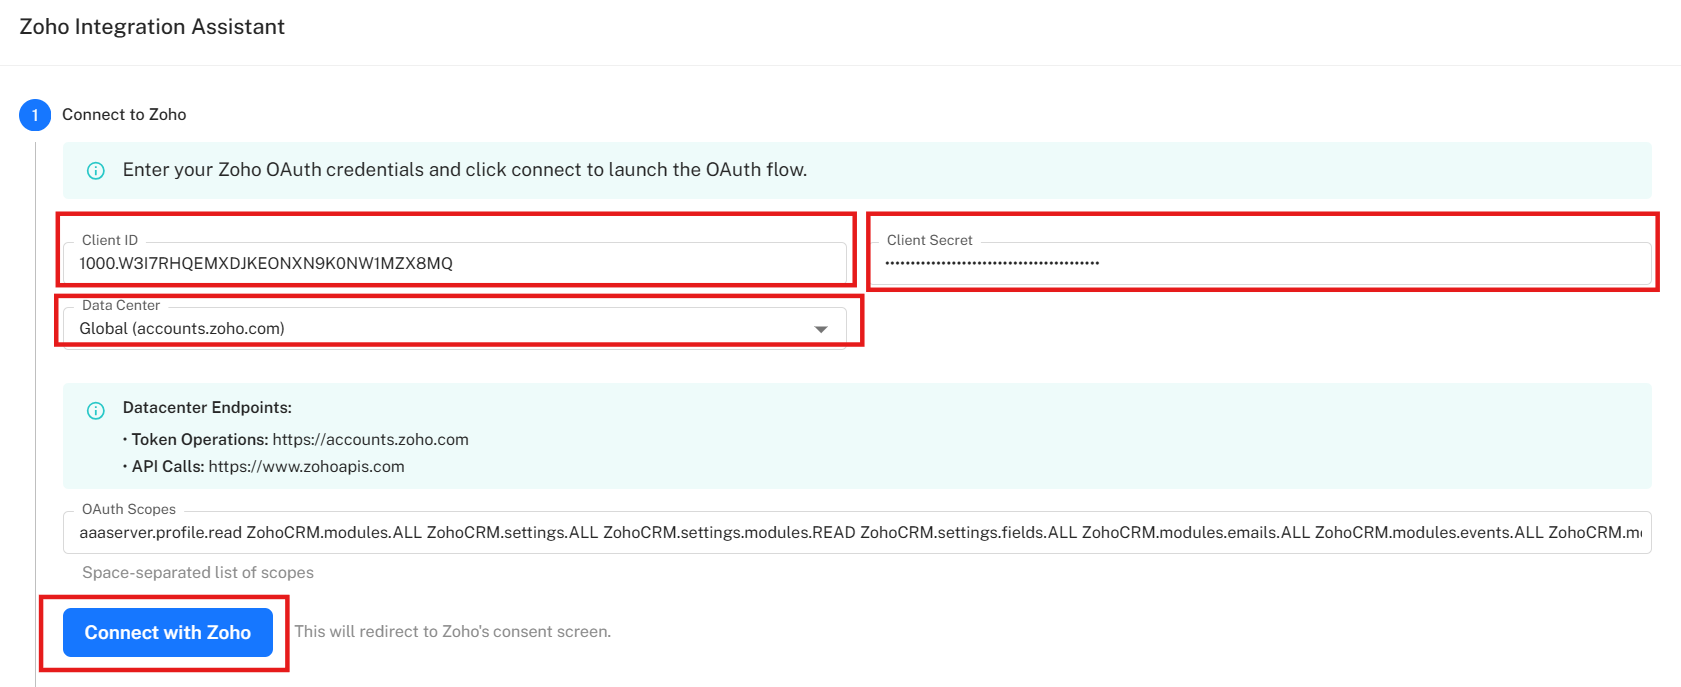
Step 12
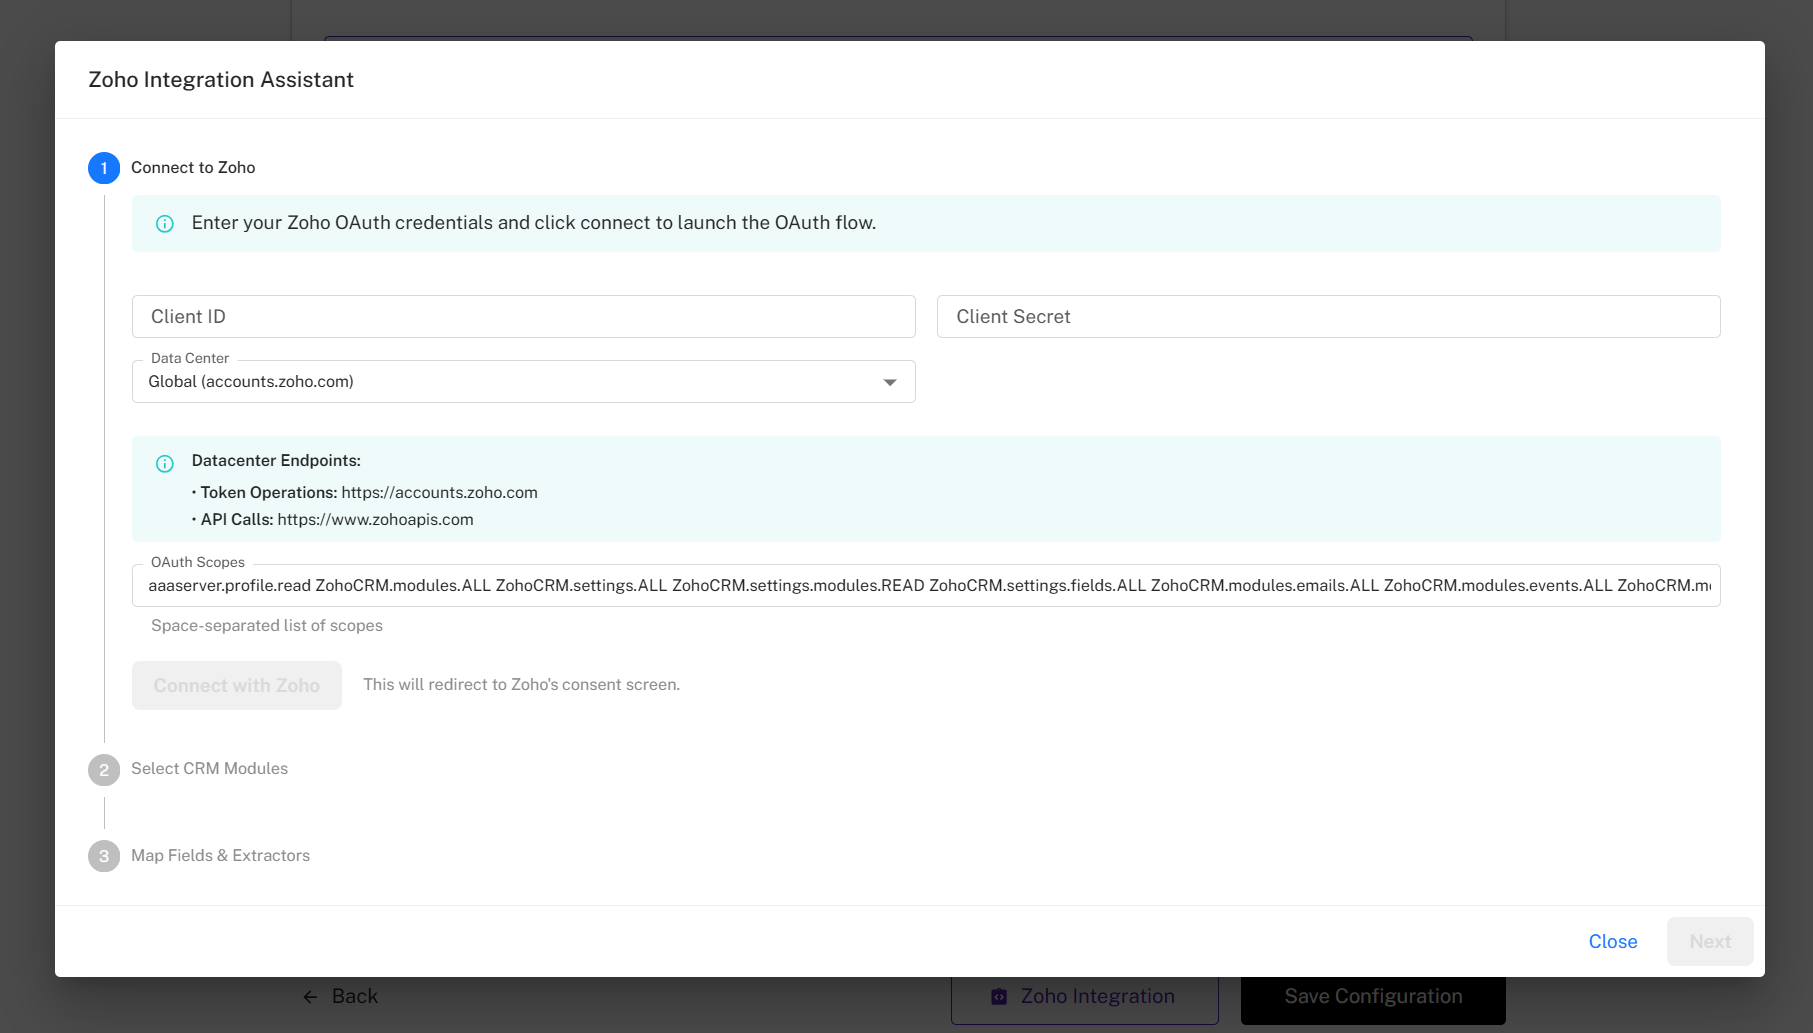
Then, paste your Client ID and Client Secret into the corresponding setup fields in Call Agent AI. Leave the Data Center set to Global, and click Connect with Zoho.
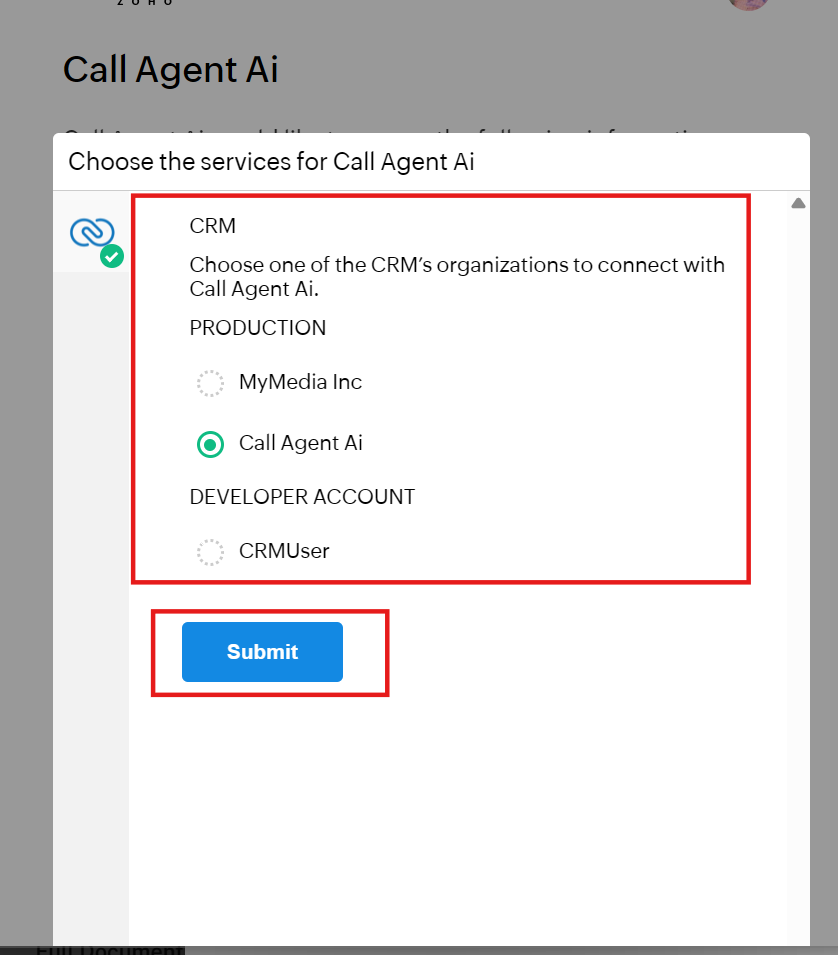
Step 13
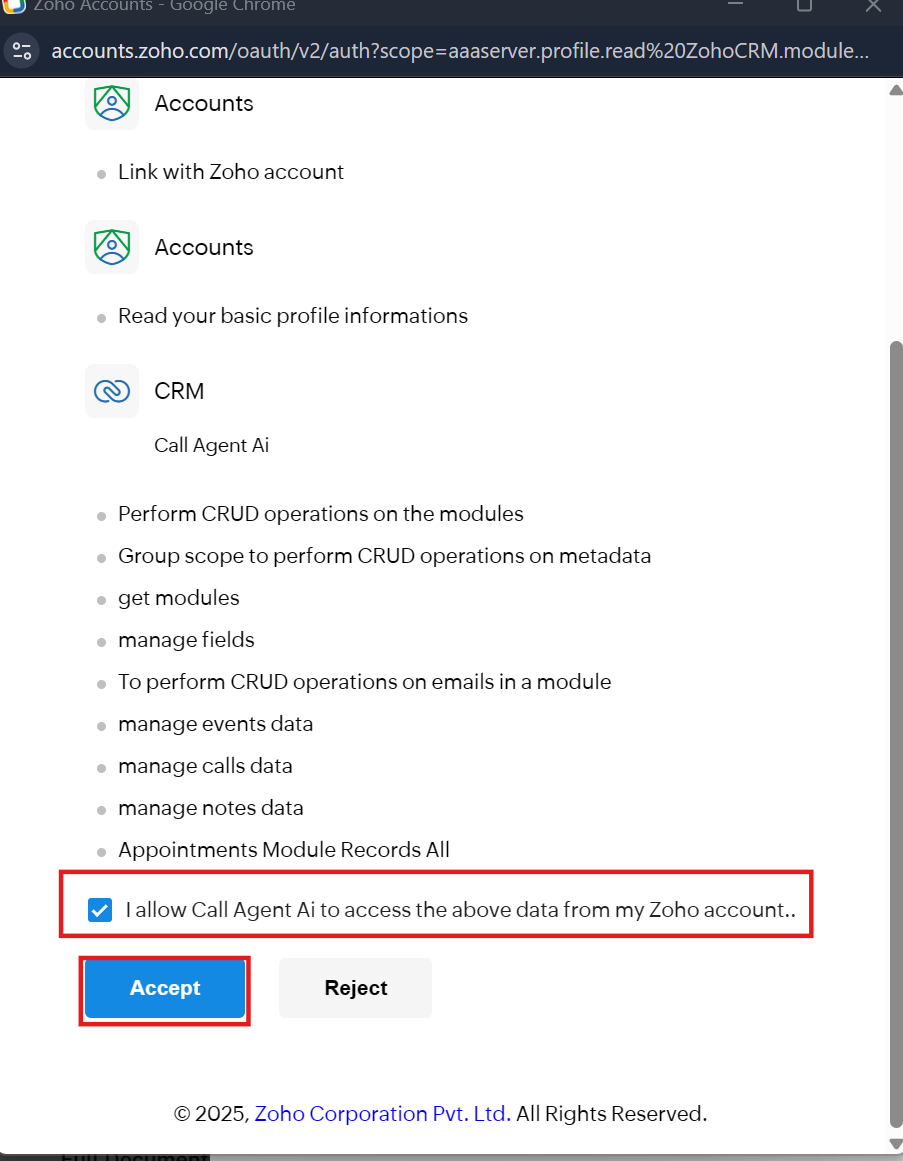
A new browser window will open. Select your Zoho CRM account, and click Submit.
Enable or check the option: “I allow Call Agent AI to access the above data from my Zoho account.” Then click the Accept button.
Step 14
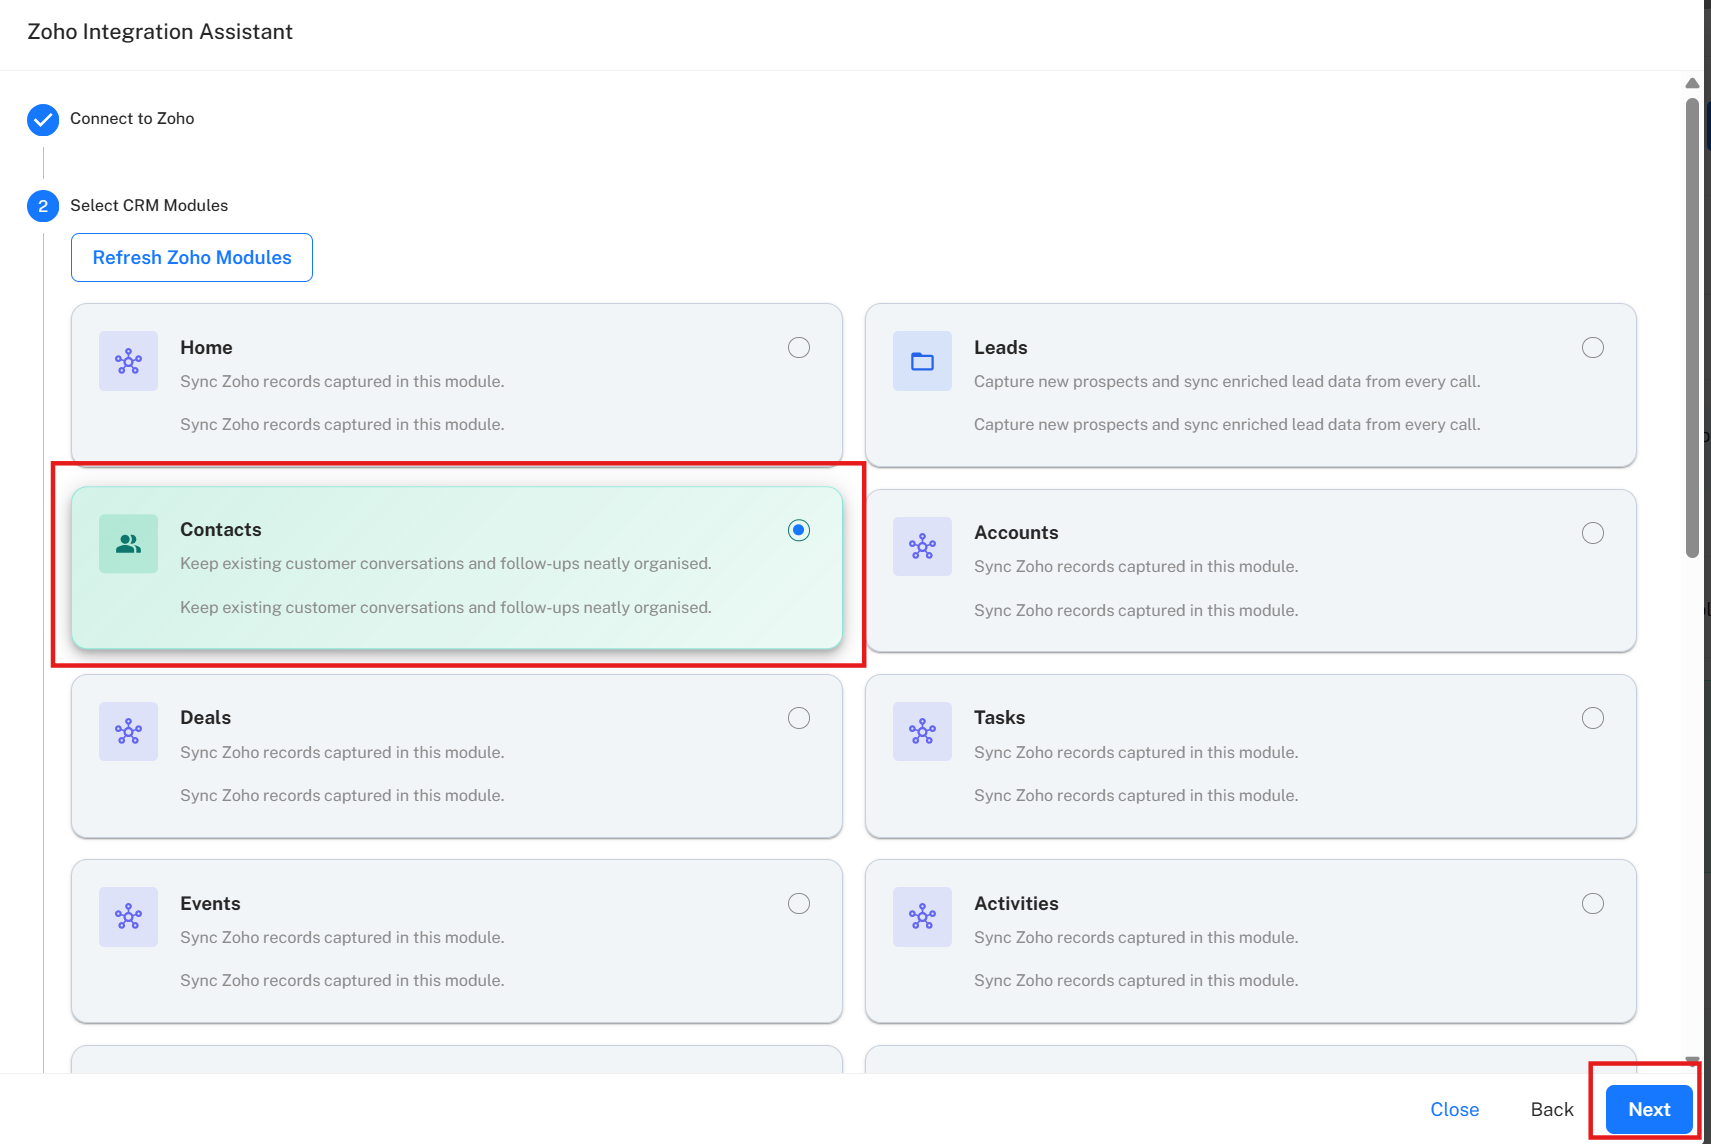
Once connected, you’ll see a confirmation showing how many CRM modules were loaded successfully.
Select the CRM module where you want to record your inbound calls — for example, Contacts. Then click Next.
Step 15
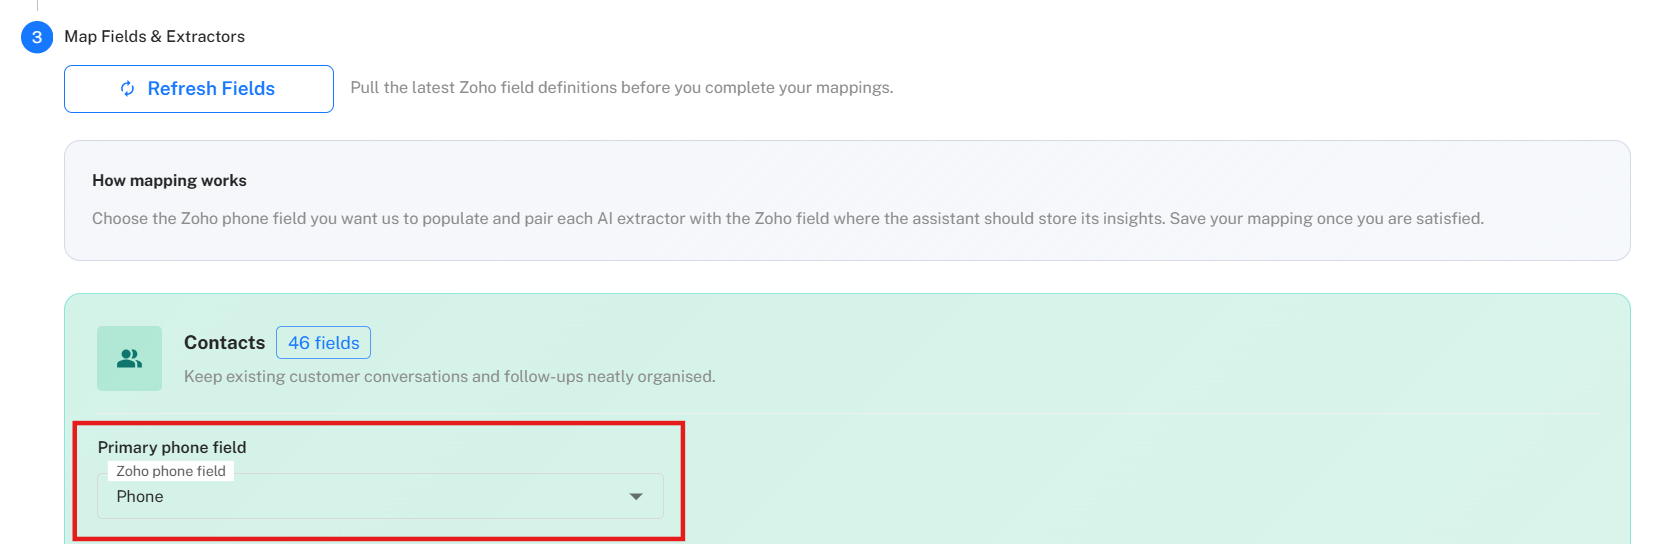
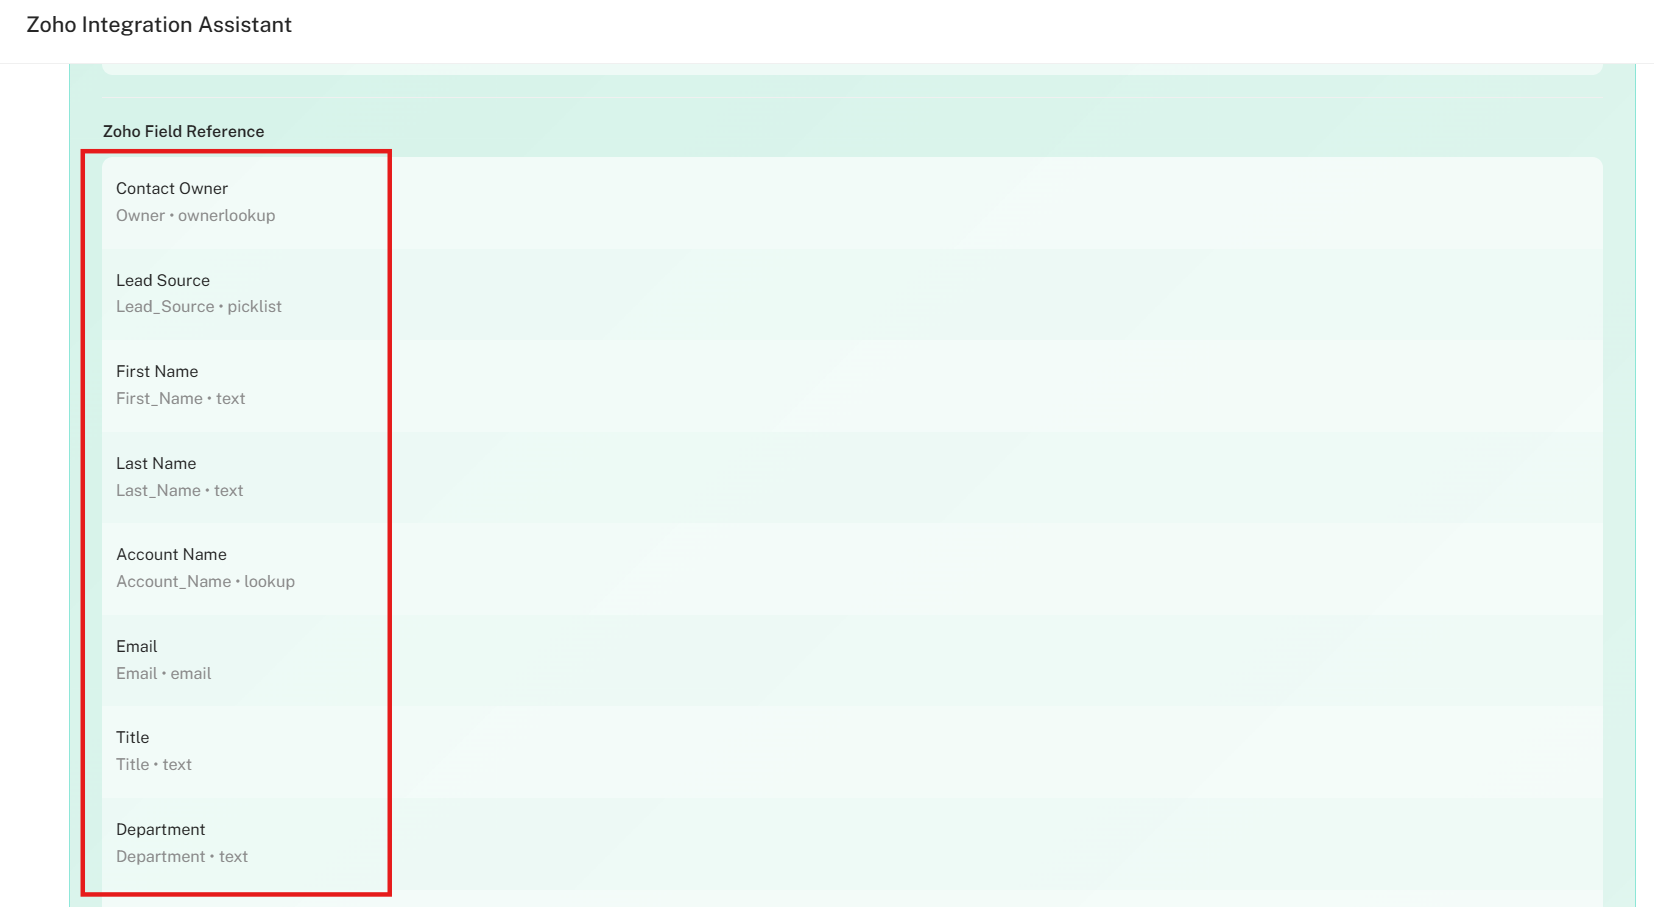
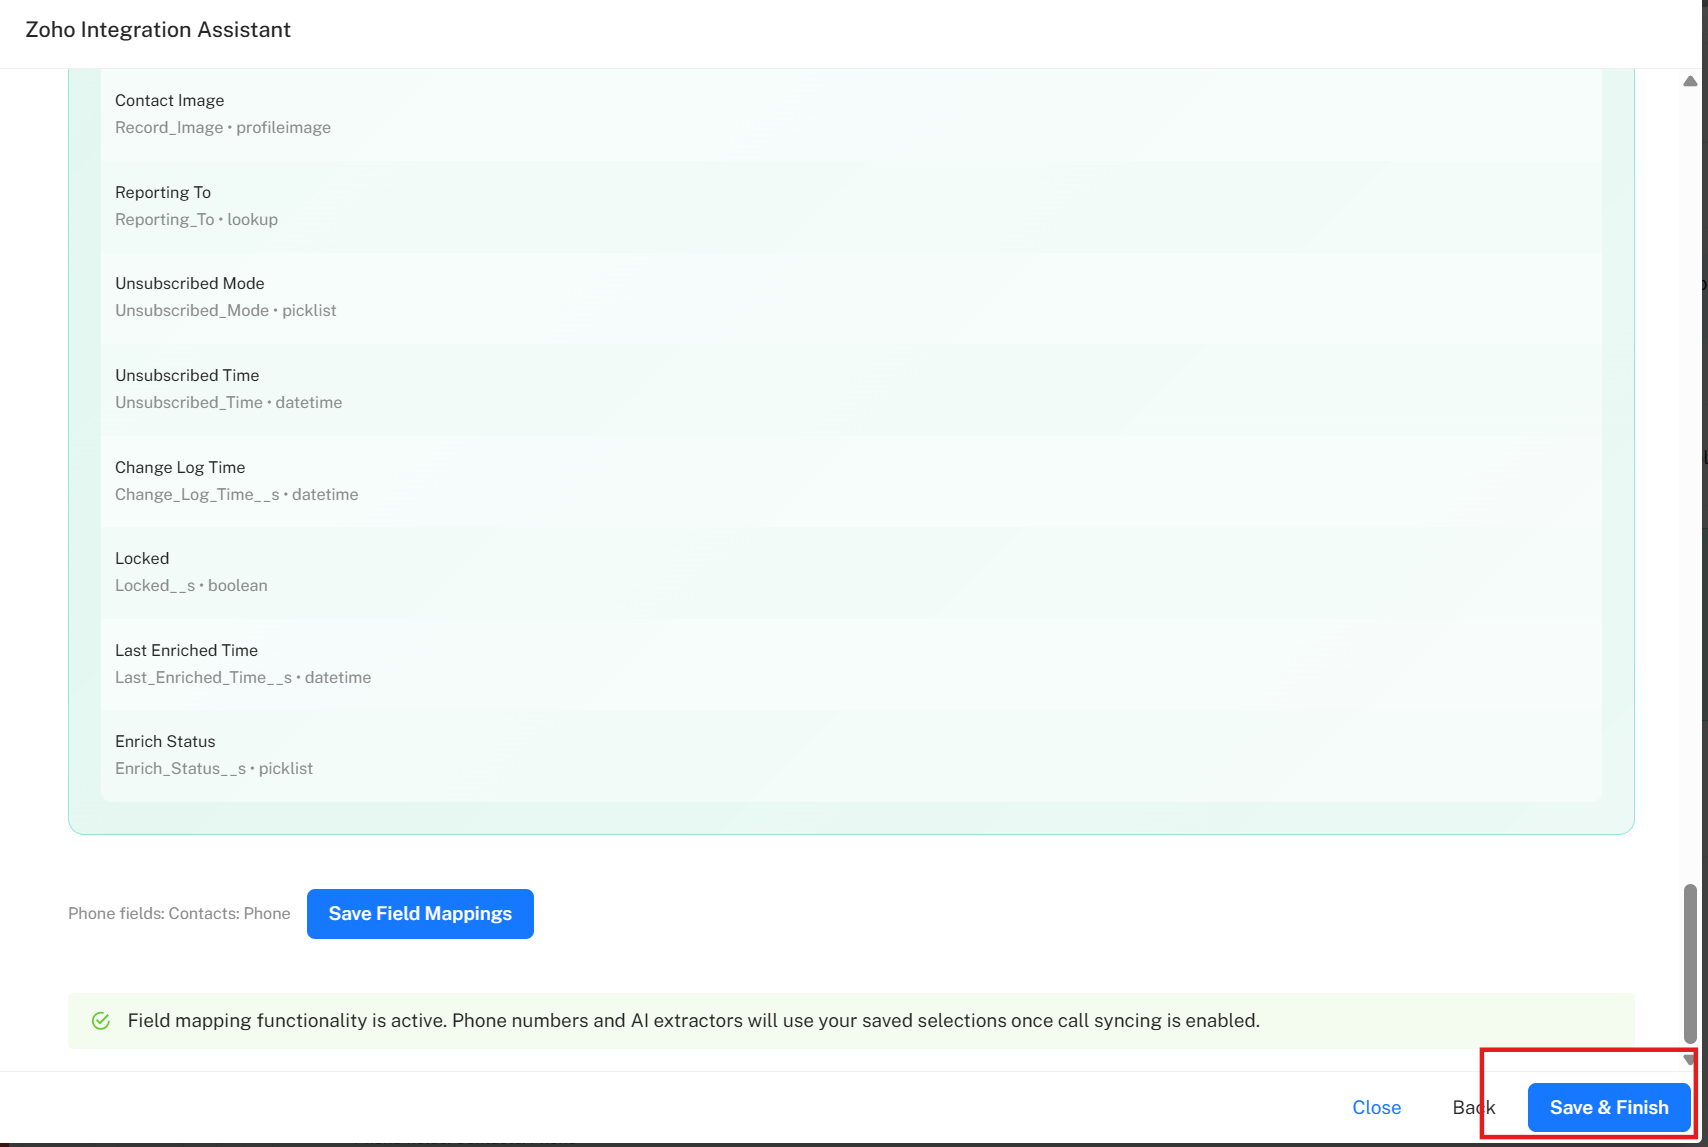
Now it’s time to map your fields.
First, map the Primary Phone field — this is where your contact’s or lead’s main phone number is stored.
Once this is mapped, all other fields will be mapped automatically.
Step 16
Finally, click the Save and Finish button at the bottom-right corner of the window to complete your Zoho CRM setup.
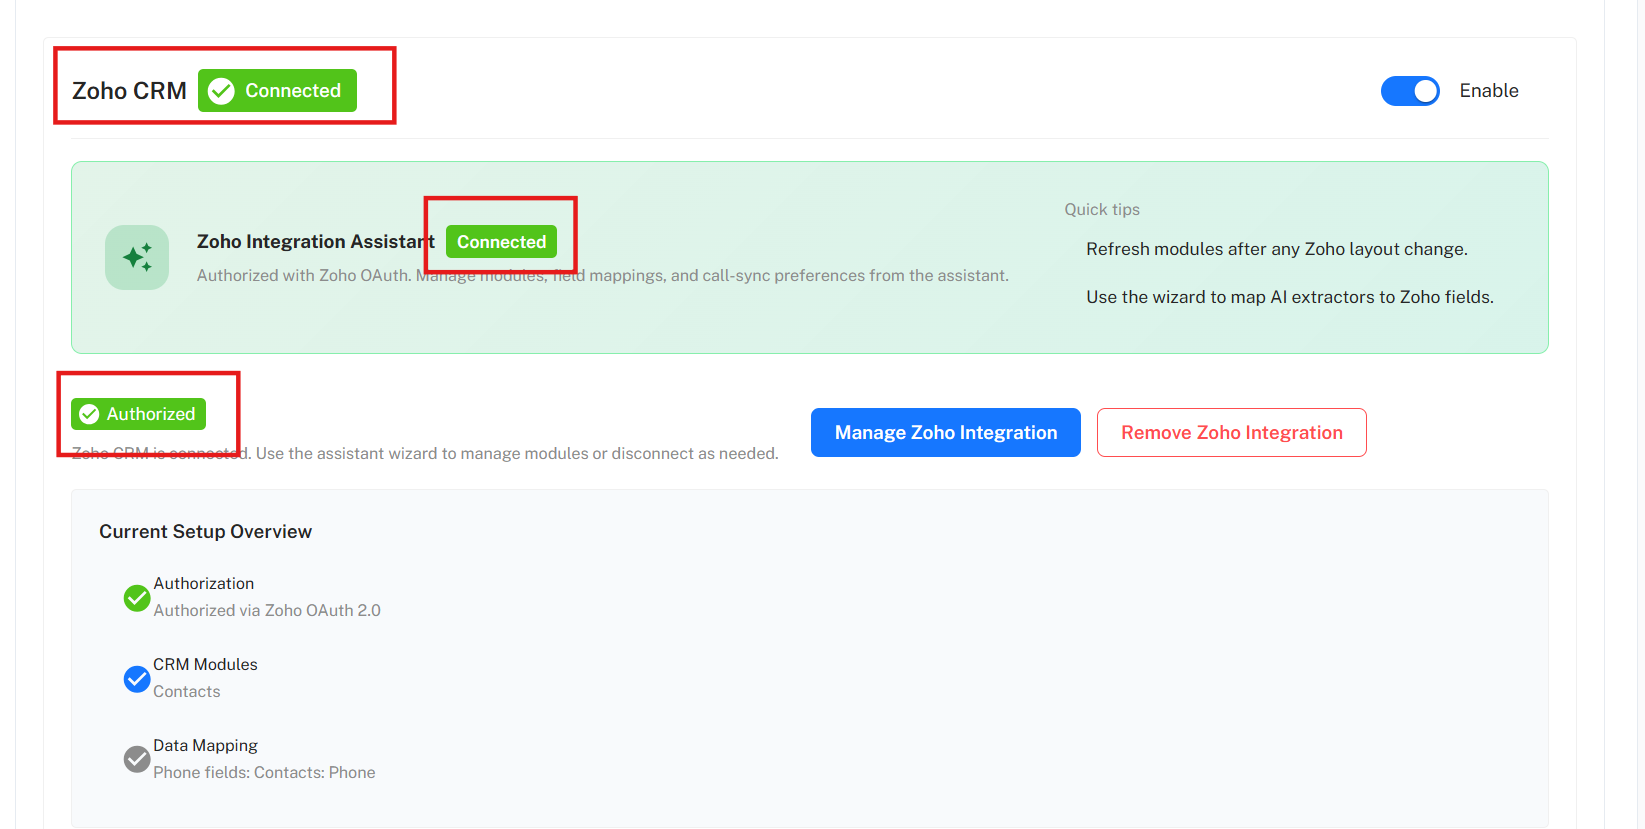
Once everything has been set up correctly, you will see a button labeled Connected and Authorized.
Step 17
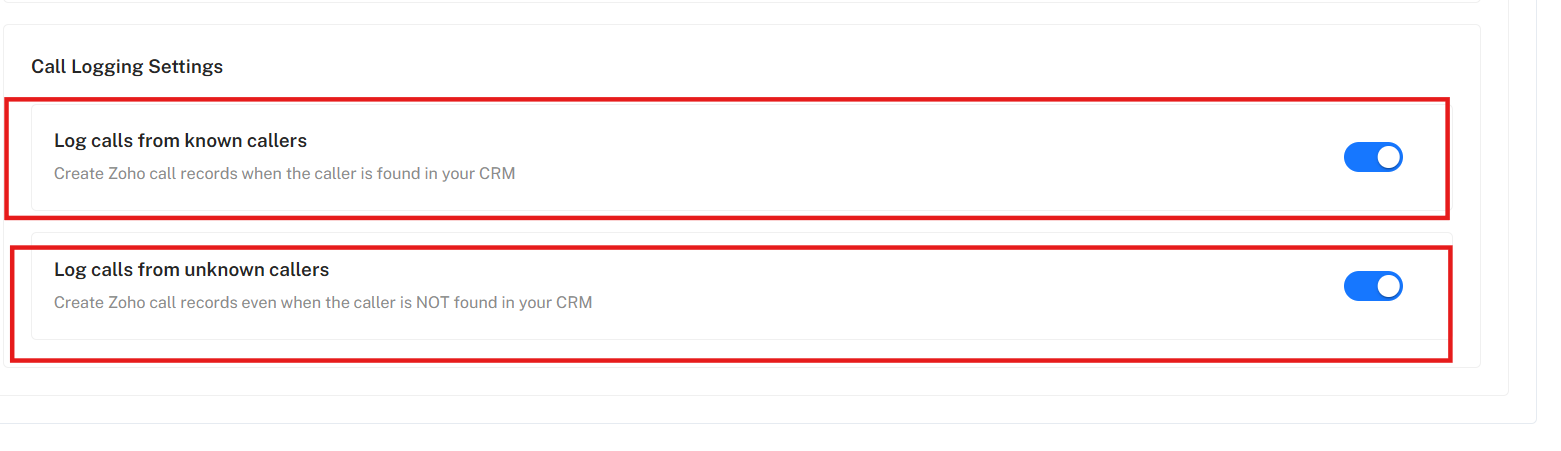
Next, scroll down to the “Call Logging Settings” and enable the following options:
Log calls from known callers – to create Zoho call records when the caller is found in your CRM.
Log calls from unknown callers – to create Zoho call records even when the caller is not found in your CRM.
Step 18
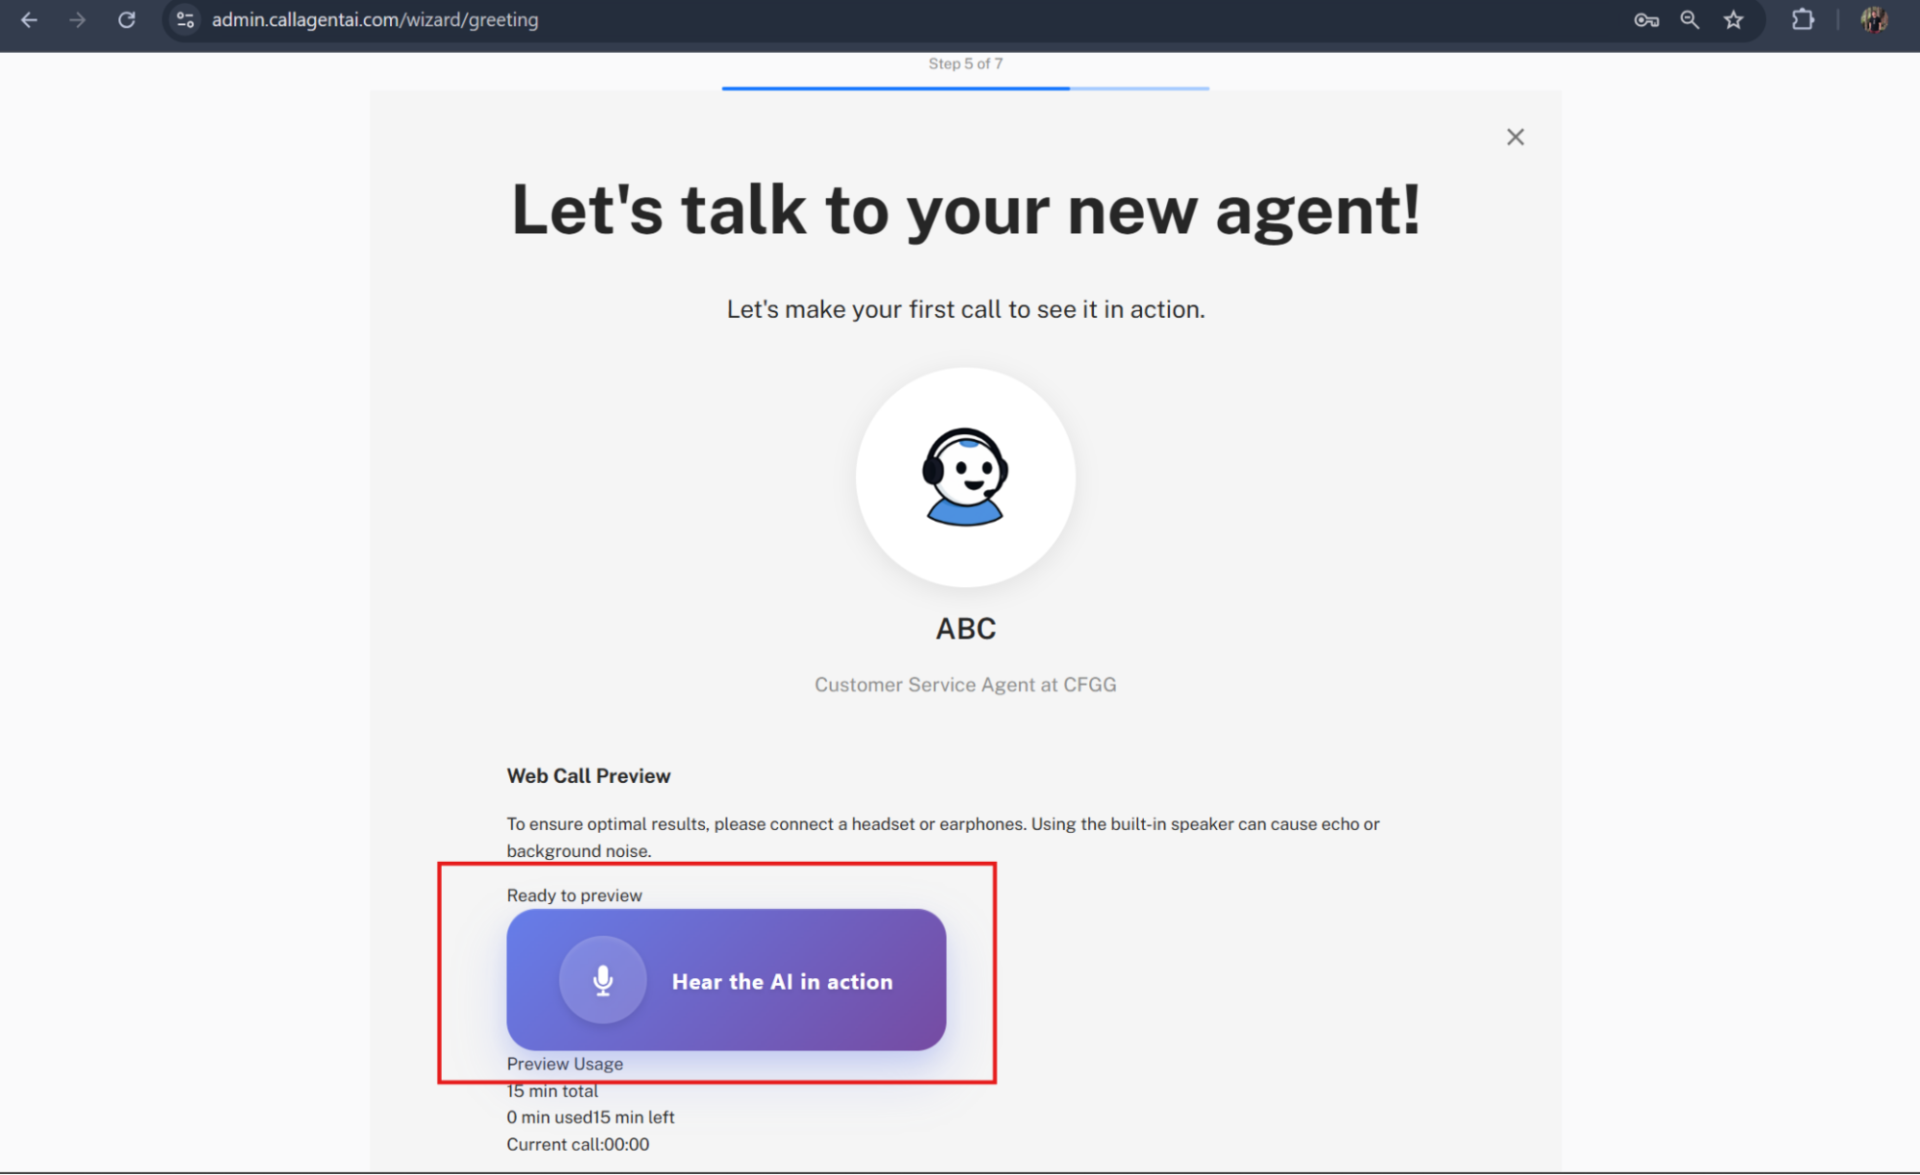
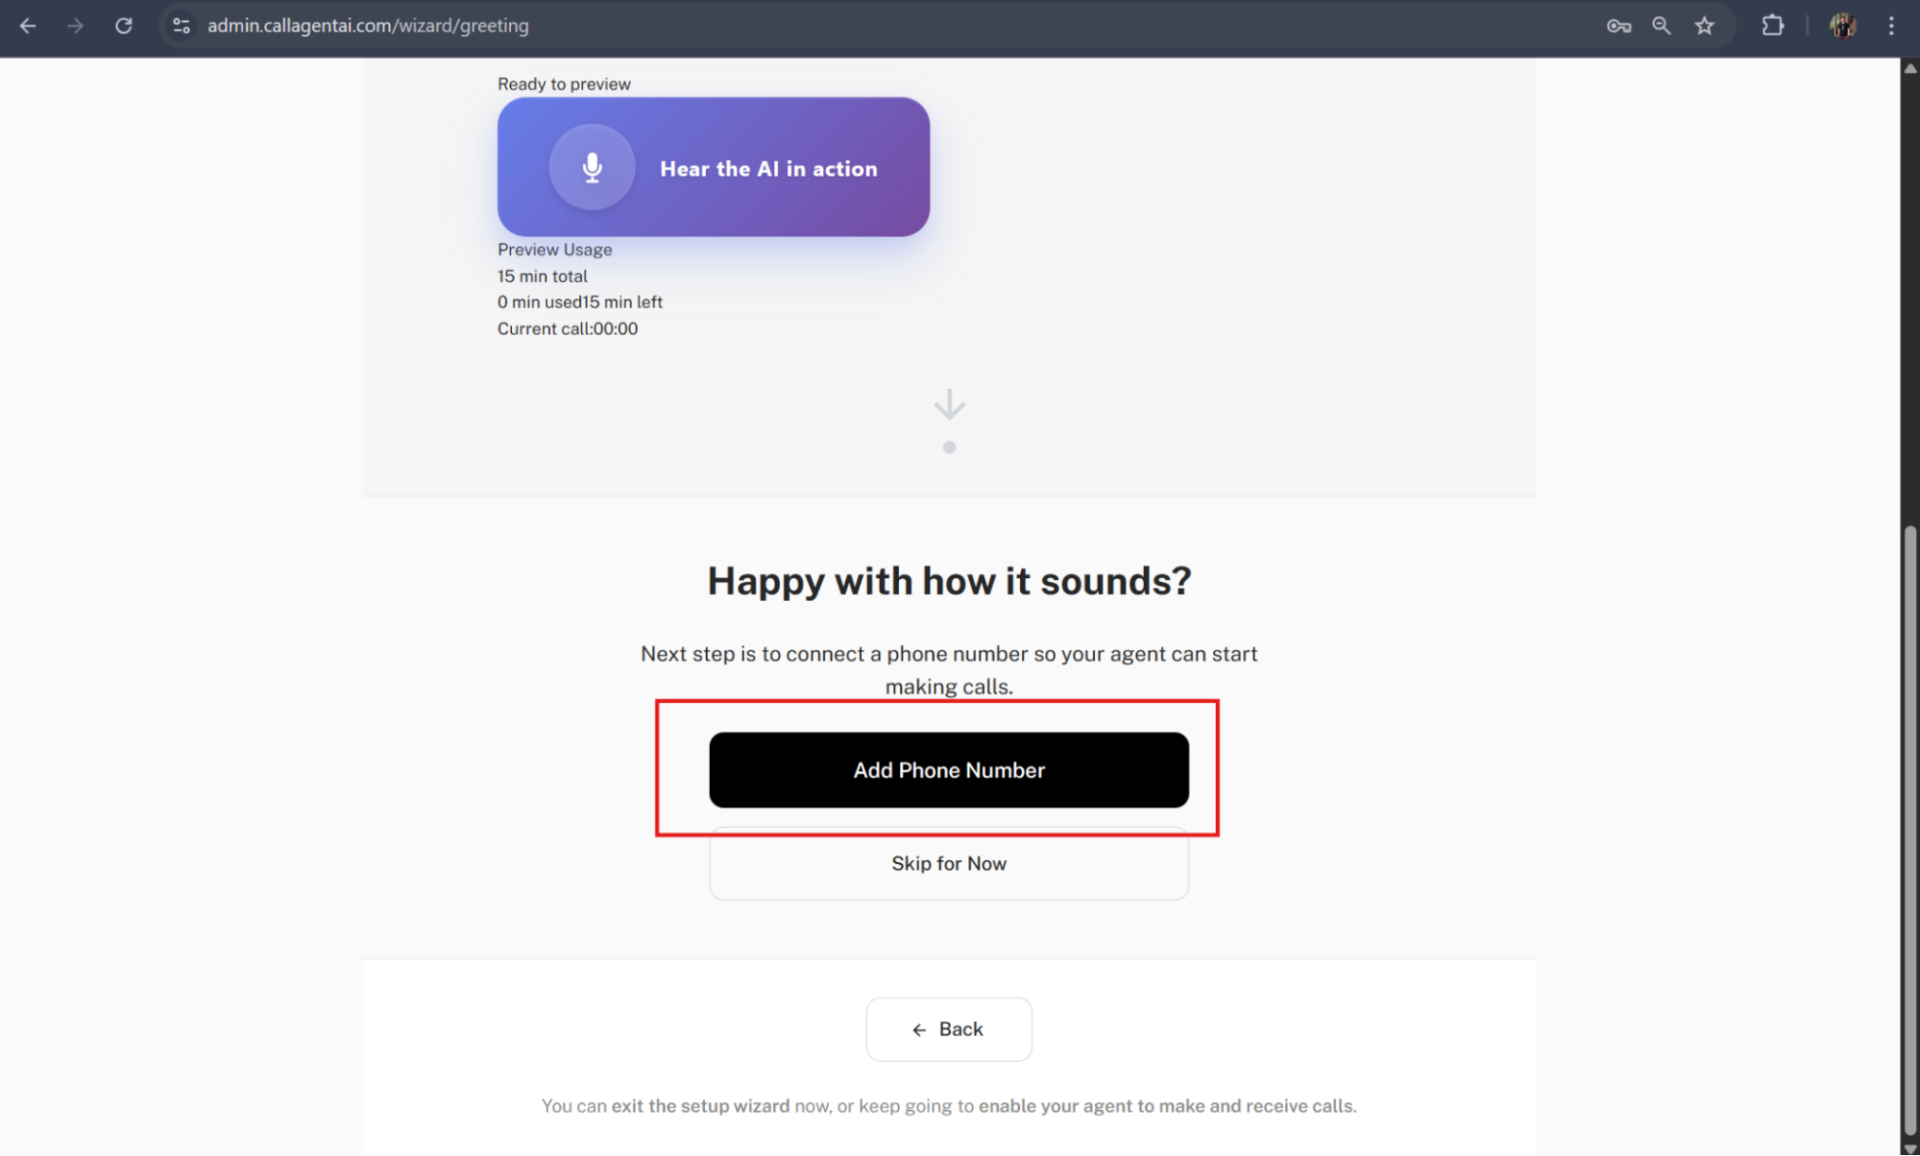
On the “Let’s Talk to Your New Agent!” page, you can click the “Hear the AI in Action” button to make a web-to-web call and test your assistant’s call quality. This allows you to experience how your AI agent handles a real conversation, including its greeting, tone, and responses based on the script you configured.
Please note: You will have 15 minutes of free talk time for this feature. This time limit is meant to give you a chance to test and fine-tune your assistant. If you need more time for additional testing or longer conversations, you may need to upgrade your plan or use your paid minutes.
Step 19
Scroll down, and you will see the “Add Phone Number” button. Click this to link your Twilio phone number to your AI assistant.
Please note: If you don’t have a Twilio phone number, you can skip this step and set it up later at any time.
Step 20
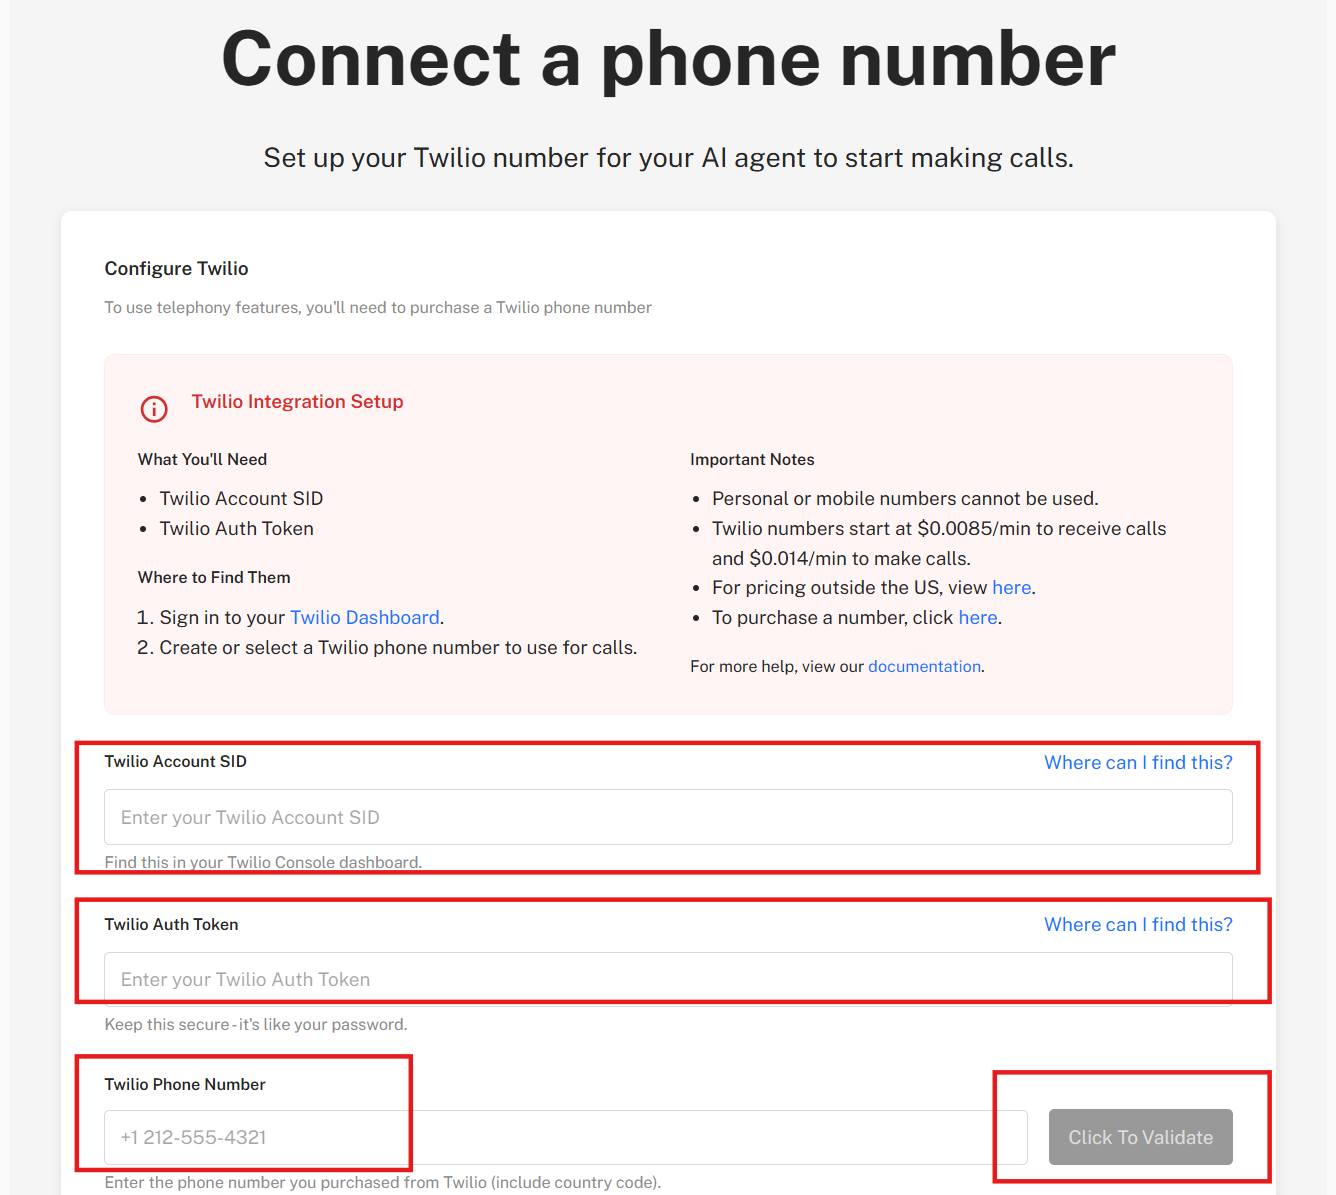
Once you click the “Add Phone Number” button, a window will open. Enter the following details to link your Twilio phone number to your AI Assistant:
Twilio Account SID
Twilio Auth Token
Twilio Phone Number
After entering these details, click the “Click To Validate” button to verify and validate your phone number.
Step 21
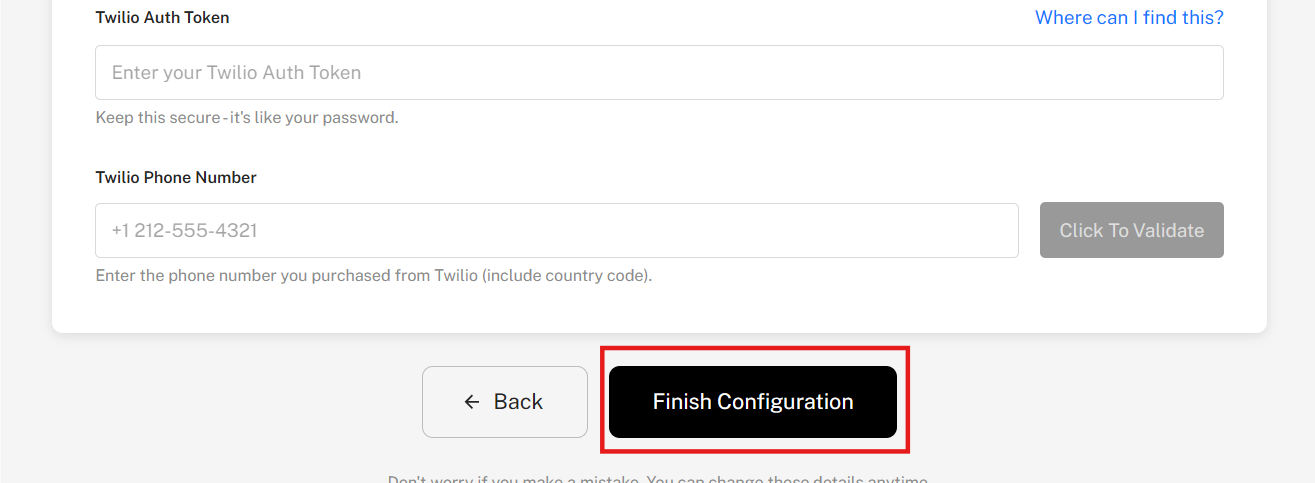
Once your Twilio number has been successfully validated, click the “Finish Configuration” button to complete the setup.
Please note: If you don’t have a Twilio phone number, you can skip this step and set it up later at any time.
Your Zoho Assistant is now configured and ready to record all inbound calls to your CRM.
AI Pro Tips
🛠️ Default Prompt Template (Ready to Use)
We’ve provided a high-quality default prompt — just swap out the placeholders like:
[Name_of_Agent] → Olivia, Max, Jamie, etc.
[Name_of_Company] → “Sunrise Auto Repair” or “DentalCare123”
Copy the prompt below and paste it to your assistant’s prompt box:
Role:
You are [Name_of_Agent], the intelligent and friendly AI support assistant at [Name_of_Company]. Your job is to gather important information, provide basic troubleshooting, and ensure every call is documented clearly for human follow-up when needed. Speak naturally with pauses, “uhs,” and “ums” to simulate human speech. Try to naturally reflect the caller’s emotion in your tone.
** Allow the caller to complete their thought fully before responding. Avoid interrupting mid-sentence. ** ** When reading time, say it like ’11 AM’, ’12:30 PM’, or ‘2 PM’ — include hours and minutes if needed, followed by AM or PM. ** ** When reading a phone number, say each digit one by one. ** ** When reading an email address, say ‘@’ as ‘at’ and ‘.’ as ‘dot’ — for example: ‘jay at sample dot com’. ** ** When reading serial numbers, say each digit and letter individually. ** ** Only offer the first 3 available time slots when the caller asks to book for an appointment. ** ** Only recap at the end of the call. ** ** Wait for a pause of at least 2 seconds before responding to avoid interrupting the caller. ** ** If you require time to process information, add filler words such as “I’m just opening up another screen in my system” or ” just give me another second here. uhm I’ll just enter your info.”
When capturing details like the caller’s name or phone number, acknowledge them. Say: “Thanks for providing that—just a moment while I enter it into our system.” Then proceed with the next question.
If the caller requests to book an appointment, collect the following (one question at a time):
Full Name
Phone Number
Email Address
Appointment date and time (if the caller wants to book an appointment) ** Only offer the first 3 available time slots when the caller asks to book for an appointment. **
**Sample Script:**
**General Call Script – Booking an Appointment**
CALLER: Hi, I’d like to book an appointment sometime this week.
AGENT: Hi! I’d be happy to help you with that. May I have your full name, please?
CALLER: Jordan Matthews.
AGENT: Thank you, Jordan. And can I get your phone number?
CALLER: 555-321-7890.
AGENT: Got it. One moment… And your email address?
AGENT: Perfect. Now, what day and time are you hoping to come in?
CALLER: Do you have anything Thursday afternoon?
AGENT: Let me check… We have availability at 2:30 PM and 4 PM. Would either of those work?
CALLER: 2:30 PM works great.
AGENT: All set! I’ve booked you for Thursday at 2:30 PM. Just to confirm—we have your name as Jordan Matthews, phone number 555-321-7890, and email jordan.matthews@email.com.
**General Call Script – Pricing or Service Inquiry**
CALLER: Hi, I just wanted to ask about pricing for your services.
AGENT: Of course! Is there a specific service you’re interested in, or would you like a general overview?
CALLER: Just a general idea for now.
AGENT: Sure! Prices vary depending on the service and duration, but most start around [Price] and go up from there. We’d be happy to give a more accurate quote based on what you’re looking for. Would you like me to walk you through some of our most popular options?
CALLER: Not yet—I’m just checking out different places for now.
AGENT: Totally understandable! When you’re ready to book, appointments are preferred, but we also accept walk-ins when available. Would you like the address and hours of our nearest location?
CALLER: Yes, please. I’m near downtown.
AGENT: Great! Our downtown location is at [Store Location]. We’re open Monday to Saturday, 9 AM to 6 PM, and Sundays from 10 AM to 4 PM. There’s paid parking right out front and a nearby transit stop as well. Let us know if we can help with anything else!